|
This is a simple exercise and prepares the horse and rider for shoulder-in. It also develops suppleness, teaches control of the rein aids and places the horse from inside leg to outside rein and developing the on off aids. The exercise is hard to do well and requires consistent riding and aids.
This can be started when your horse is balanced round circle, responsive to your aids, and when you have good control of your leg aids and a balanced seat and soft hands Start the exercise with a shallow bend and then gradually increase the bend as your horse's strength improves. Teach the exercise in walk to give you both time to understand it and then progress on to trot.
Common Problems. Over bending or horse drops to outside shoulder. Usually caused by the rider using too much inside rein. Keep your inside rein light and turn your shoulders slightly to the inside. Your horse moves off track with insufficient bend. It may be that the inside rein is too tight, blocking the inside hind leg from moving, or that your horse has braces their ribs against your leg. Correct this by ensuring that you are correctly balanced, then close your body slightly towards your outside elbow. If your horse becomes very contracted and short, check the balance of your rein aids and, if you are in walk, circle and stretch your horse softening the inside rein. If you are in trot, ride straight forward and ask for a little lengthening with a loose rein Some horses have weak necks, and so their neck moves a lot. Ensure that your inside rein does not take back and support the movement delicately with your outside rein so they move from your inside leg to your outside rein. Diane Followell - Training Riders, Transforming Horses This simple exercise provides many benefits for both horse and rider, creating more suppleness, starting to engage the inside hind, teaching the light connection to the outside rein and beginning to move away laterally from the rider's inside leg.
A basic spiral exercise can be started once your horse understands how to form a correct circle. The circles don’t need to be perfect, but the rider needs to be able to correct any mistakes well.
Variations The variations for this exercise are many, and you can decide what to do during the exercise depending on how your horse feels. One thing that is important to remember is that if you have planned to do a specific series of movements, but your horse does not feel ready, change your plans for something easier. If your horse feels better than you expected, change your plans to something more advanced! All variations improve the connection from inside leg to outside rein if ridden correctly.
 In my blogs earlier this year, I covered how to start working your horse in-hand and how to do circles in-hand. When the circles are balanced and easy, you can begin to ask your horse for some side steps. These side steps teach your horse to move their inside legs across the outside legs as a preparation exercise for lateral movements. Come to the middle of the school and halt with your horse’s fore legs level. If they are not level, walk on and halt again. Then ask for a very small inside bend with the lunge line. Use the whip to gently tap your horse’s inside hind leg until he moves it. You will need to balance him with the lunge line to prevent him from stepping forwards. At this stage it doesn’t matter how much he moves; some horses will lift a small amount, others will pick the leg up higher. Reward him when he moves the leg. If he becomes anxious, go back to some circles and try again another day. Once your horse is lifting his hind leg up immediately when you touch it, you can ask him to step across by continuing to tap his leg once he has lifted it. When he steps it across the other hind leg, immediately stop tapping, halt (whip on the quarters) and reward him. As always, some horses find this easy, others take more time to understand. If your horse is finding it easy, don’t be tempted to ask for too much too quickly. Take time to build his strength and suppleness. If he is finding it more difficult, go back to the work he is comfortable with and then try the side steps just once in each session, and if he doesn’t lift the leg it doesn’t matter. Don’t push things, patiently repeat the aid a little more robustly. Continue to do single steps for a few days until your horse starts to offer the side step straight away, then you can ask for a second and third step. As your horse steps across with his hind legs, you should allow his front feet to follow, crossing round a very small circle. Try to keep your feet moving round a small circle as well, not stepping backwards. If you plant your feet, you will block his movement and he will become twisted and stuck. Take your time. Don’t expect it all on day one. Be satisfied with a calm lifting of the leg for day one and build it over several days; work in your horse’s time. When he is confidently offering the steps, allow him to make the movement for himself, and just make corrections. Diane Followell - Training Riders, Transforming Horses 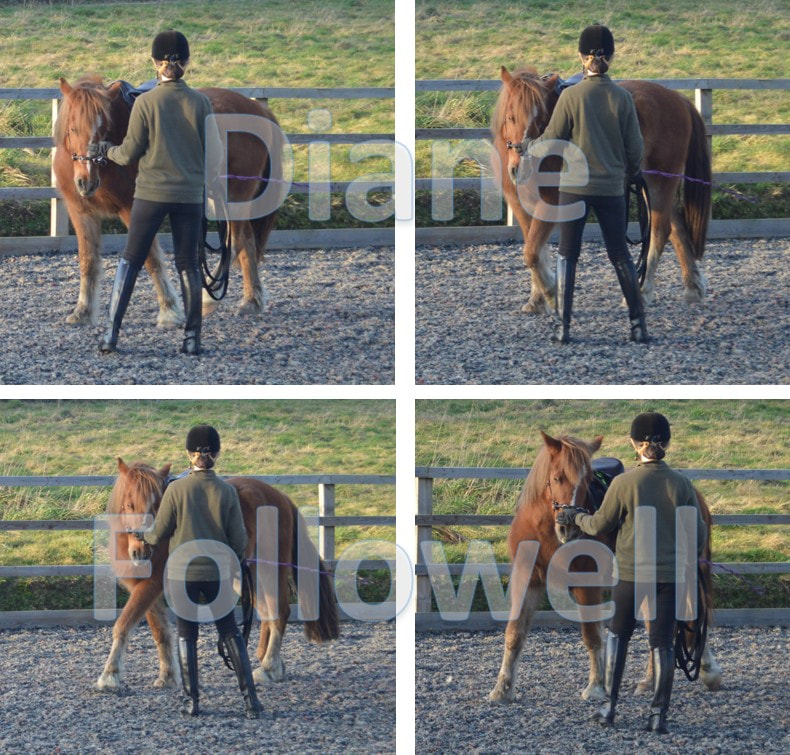 In last month’s blog I wrote about the benefits of in hand work with your horse and how to start and stop when working in-hand. This month covers the next stage, circles. Once your horse is walking on and halting with confidence, you can start to go around circles. Begin by walking on a straight line and then start to bring yourself round the circle and your horse should follow you. 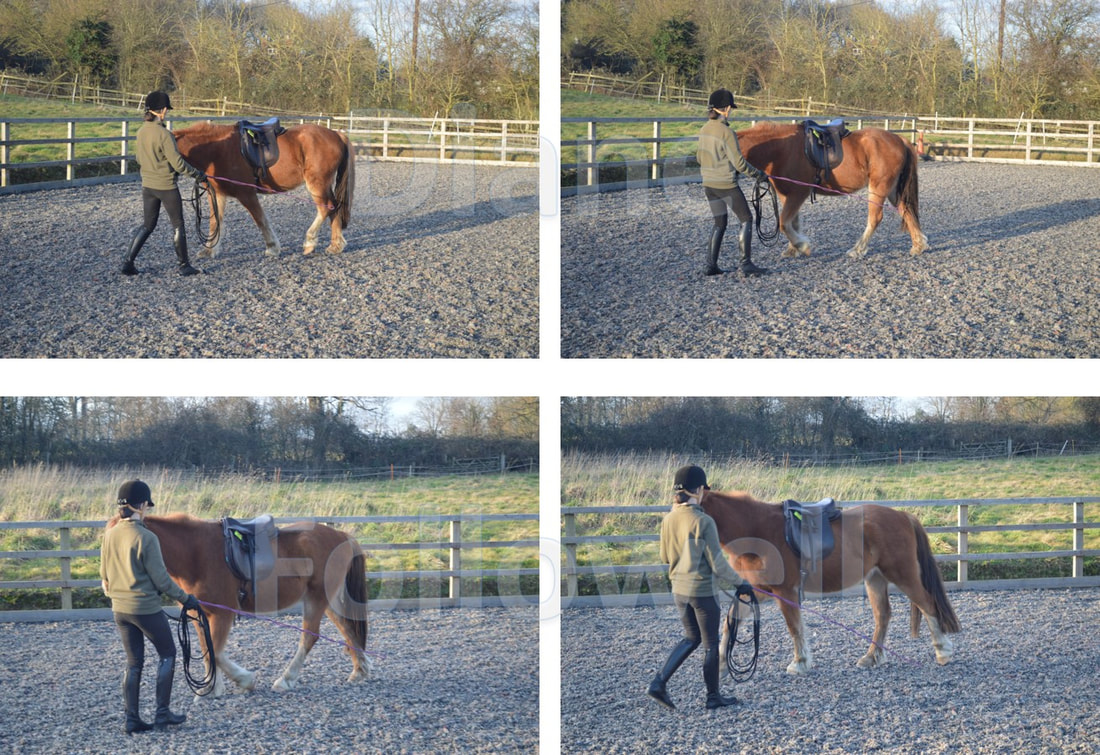 If your horse continues down the side of the school, don’t try to pull him round the circle as this could make him push his outside shoulder out and fall more away from you. Instead, gently indicate to him that you want him to follow you with a soft give-take on the lunge line to bring his head round.
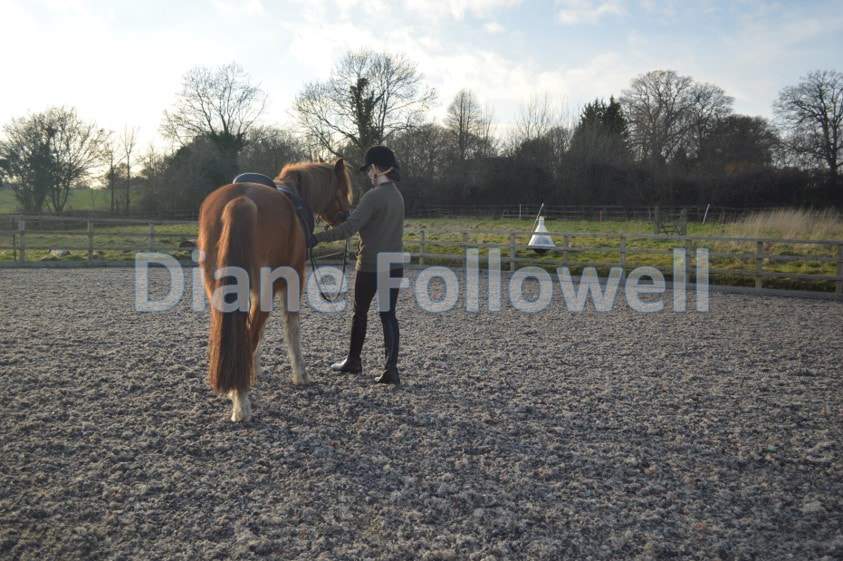
The hardest part is for you to make a correct circle shape, usually riders step to the inside, so move slightly towards your outside shoulder to avoid this. It is important that your horse starts to curve round the shape of the circle, so initially don’t make the circle too small, give both of you a chance to understand what you are doing. Keep your space: if he crowds you by falling in through his inside shoulder, use your hand against his shoulder or the whip gently on his side to invite him to move away. If he drifts away from you, make sure the whip is quiet and gently give-take on the lunge line to bring him round. Keep walking backwards to draw him round the circle. Stay in front and to the side of him. After you have completed the circle go on to a straight line making sure you give your horse enough space between you and the fence, and halt. You can then build up to more circles and, as your horse becomes more supple and balanced, you can make the circles a little smaller. Diane Followell - Training Riders, Transforming Horses 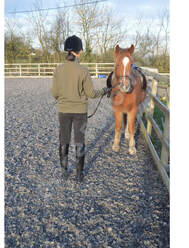 In-hand work is a very useful method for helping horses develop the strength, suppleness and understanding of movements without the added weight of a rider. I also use this technique to help riders with difficulties in certain movements. At the Quinta all our young horses were started using this in-hand method and by developing the basic work in hand before the rider was in the saddle. The whole process of starting the horse was calmer and simplified. They had the strength and balance to carry the rider more easily, and understood the basics; walking and halting, circles, stepping sideways, shoulder-in and rein back. Further on in their training, in-hand work was used to introduce the first steps of piaffe and passage. There are two methods of working a horse in hand, and I use both in my teaching. The first is to work the horse from the ground by using the cavesson and the second is to work them using the reins. I start horses and riders using the cavesson because it is easier for both the horse and rider and is less harsh for the horse if the rider makes a mistake. The model for the pictures is a young pony who is learning in hand work as part of being backed. General Points Use the lunge cavesson and whip with the long end wound up round the whip handle. Stand in front of, and to the side of your horse, so that you can see all of him and he can see past you. The lunge line should be safely looped up and held close to the cavesson. Have your elbow near your side so you can control your horse on the cavesson. 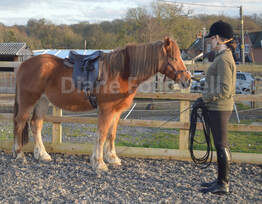 Hold the whip in your other hand. Have the handle in the palm of your hand so you can rotate your wrist, and hold it pointing it down towards the floor when you are not using it, and raise it gently when you use it. Keep yourself on the inside; don’t step across your horse or allow him to step across you. When you are walking, you need to step backwards and at the same speed as he does– but he should not rush past you. Use a light flick on the lunge line against the cavesson to slow him down. Keep your shoulders soft and your elbows bent, a lot of riders let the horse go past them and then they lose control of the horse, or hold their hand close to themselves which draws the horse’s head inwards, pushing the horse towards the outside shoulder.
Some horses are very wary of the whip, so you can use a schooling whip or just your hand if they are more settled like that. 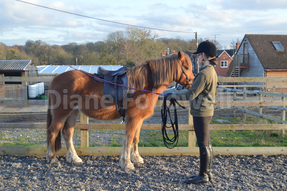 Walking and Halting Stage 1 The first thing to teach your horse is to stop. This is done by gently placing the whip on his quarters but first you need to acclimatise him to this. He already understands the lunging instructions and so start by using these voice directions. Gently encourage him to walk forwards, stepping back at the same time and speed that he does (some horses can be confused when you stand in this position, but gently encourage them to walk and they will move forward.) 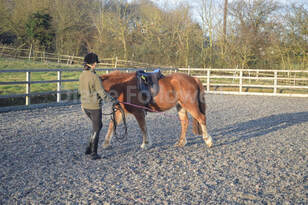 Then, using your voice only, ask him to halt. If he does not stop you can use a small jiggle on the cavesson to help. Try to keep the tension out of your body and just hold the whip softly, pointing down. It’s very important that this work is done calmly and quietly. Your horse will take triggers from your voice, body position and the whip (as well as any noises from outside!) When he has taken a few steps, ask him to halt, again using your voice. You need to stop walking backwards when your horse stops. If you stop before he does he will walk straight past you! When he stops, give him a pat. Repeat this a few times until you are both comfortable with walking and stopping. Stage 2 Now you can introduce the idea that the whip is asking for halt. We do this through 3 steps. Firstly, ask your horse to walk and then ask your horse to halt by the wall or fence. When your horse is quietly standing, very gently raise the whip up and rest it on his quarters. Some horses move away from the whip because they understand that this is what the whip indicates. Quietly lower the whip and ask them to stand again using your voice and repeat the raising of the whip to the quarters. 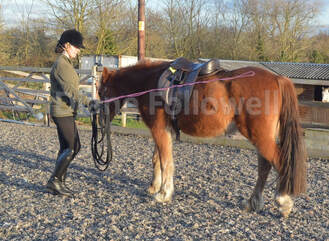 Stage 3
Once your horse is standing quietly from your voice command and doesn’t move when you raise the whip to his quarters, you can start to lift the whip while he is walking. Ask your horse to walk on and then, using your voice ask him to halt and at the same time, raise the whip to his quarters. Repeat this several times until he is quietly halting as you use both your voice and the whip together. You can support this with a light feel on the cavesson, but don’t rely on this aid. If he becomes anxious at any time, go back to the previous step. Stage 4 Once he is stopping confidently from both your voice and the whip, start to bring the whip up before you use the voice command. You are looking for him to stop from the whip movement and your voice becomes a supplement to confirm the action. Look for the moment when your horse stops as you bring the whip up, before it touches his quarters! Some horses pick this up very quickly, whereas others take a few sessions. It’s important that you don’t rush things. This work it takes as long as it takes, especially if both you and your horse are learning together. Again, if at any point your horse becomes anxious, go back to the level he was comfortable with and repeat that step until he is calm again. Common problems that riders find with this technique are:
Sometimes it is because the aid you are giving is too big or the whip is not still.
Diane Followell - Training Riders, Transforming Horses 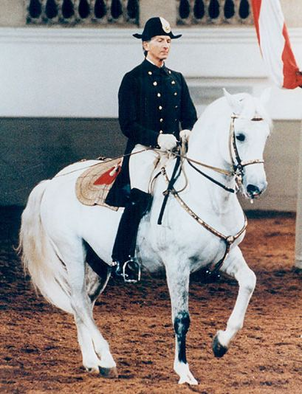 Arthur Kottas Heldenberg Arthur Kottas Heldenberg Talking with many people about dressage I have found that there are a lot of different interpretations of the terms used to describe the qualities we are trying to develop in our horses. I have looked at the Oxford Dictionary, the FEI Judging guidelines, and descriptions from the works of classical riders to try to find a common thread between them. In this and the next two blogs, I have attempted to draw together some of the differing concepts for commonly used terms. Rhythm The interpretation that generally comes to mind when talking about rhythm is “A strong, regular repeated pattern of movement or sound. A regularly recurring sequence of events or processes.” -oxfordenglishdictionaries.com For dressage, this dictionary definition is appropriate, however the FEI Dressage Hand Book Guidelines for Judging give a more precise definition relating to dressage: “The characteristic sequence of footfalls and phases of a given pace. “ In dressage terms, rhythm is the regularity of the foot falls the horse makes; it is not the speed of the footfalls, that’s the tempo. The following quote by Arthur Kottas Heldenburg from his book Kottas on Dressage, (page 100), expands on the definition and starts to define more of the qualities that are needed for a horse to have a good rhythm. “The rhythm is correct when the horse moves with ease, in a stable and balanced posture, active and relaxed at the same time. The horse feels good and works with pleasure; the rider is relaxed stable and can work without tiring.” The emphasis here is that the horse has learnt to balance himself through correct suppling exercises and has the strength to maintain the regular rhythm. Points to consider
Impulsion The definition on Impulsion from oxforddictionaries.com gives the impression of force or pressure being used, which is not quite in line with the dressage meaning: “the act of impelling or the state of being impelled motion produced by an impulse: propulsion a driving force; compulsion." The FEI Dressage Hand Book Guidelines for Judging gives a slightly different description: “Impulsion is the transmission of controlled, propulsive energy generated from the hindquarters in to the athletic movement of the eager horse. Its ultimate expression can be shown only through the horse’s soft and swinging back and is guided by a gentle contact with the rider’s hand.” Arthur Kottas Heldenburg From Kottas on Dressage page 203 “The propulsive energy generated by the horse’s hind quarters and controlled by the rider’s leg, seat and reins.” Nuno Oliveira’s description takes things a little further, showing that impulsion is more than just power or energy: “Impulsion can be defined as the ability by the horse to stay in the same cadence, the same position [attitude], with the same level of energy without the constant help of the rider.” Nuno Oliveira from “The Wisdom of Nuno Oliveira” by Antoine de Coux (page 74), and on page 67 “Impulsion has nothing to do with speed. Impulsion begins by the mind of the horse, not his legs.” By this he means that the horse must be willing to go forward when the rider lightly touches with the leg. The FEI definition only focuses on the physical side of impulsion i.e. the energy and where it is directed, and emphasizes a gentle contact through the reins. Classical dressage combines this with the attitude of the horse in terms of its self-carriage, enable through controlled strength and balance. Engagement For this term, the oxforddictionaries.com description is far from the meaning that dressage implies by the word. It defines engagement as : “The action of engaging or being engaged” However, the definition of Engage gives a more meaningful description in dressage terms “Engage, (with reference to a part of a machine or engine) move into position so as to come into operation.” If we take this explanation and relate it to the action of the horse’s haunches, it becomes more meaningful. The FEI Dressage Hand Book Guidelines for Judging shows it is more than simply bringing something into position, such as the horses haunches. “Hind legs stepping well under the horse’s body. Increased flexion of the joints of the hind quarters during its weight-bearing phase. This causes a relative lowering of the hind quarters/ raising of the forehand, thus shifting more of the task of load bearing to the hind quarters. A prerequisite for upward thrust/impulsion.” This explanation has a good description of the mechanics of engagement, but a horse cannot engage without impulsion, so you have a circle of requirement: increase the impulsion and you can increase the engagement. Arthur Kottas Heldenburg (from Kottas on Dressage page 203) describes engagement as “The hind limbs are said to be engaged when, during the forward (stance) phase of the movement, they are placed sufficiently forward under the horse’s mass to enhance balance and provide a good level of forward propulsion/lift.” Whilst these definitions give good descriptions of engagement, they don’t convey the whole picture. Engagement is part of a process that enables to horse to carry their weight towards the haunches and lighten the forehand. It is one element combined with balance, suppleness, rhythm and impulsion which brings the horse to its point of collection and lightness. Diane Followell - Training riders, Transforming Horses
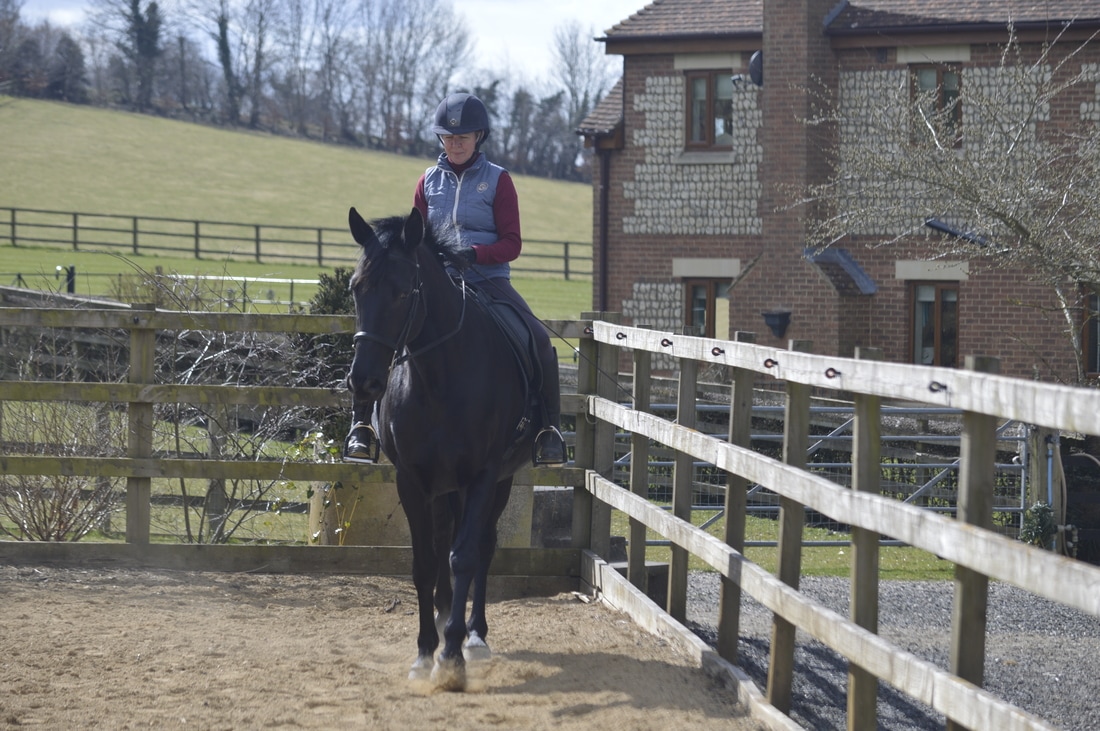
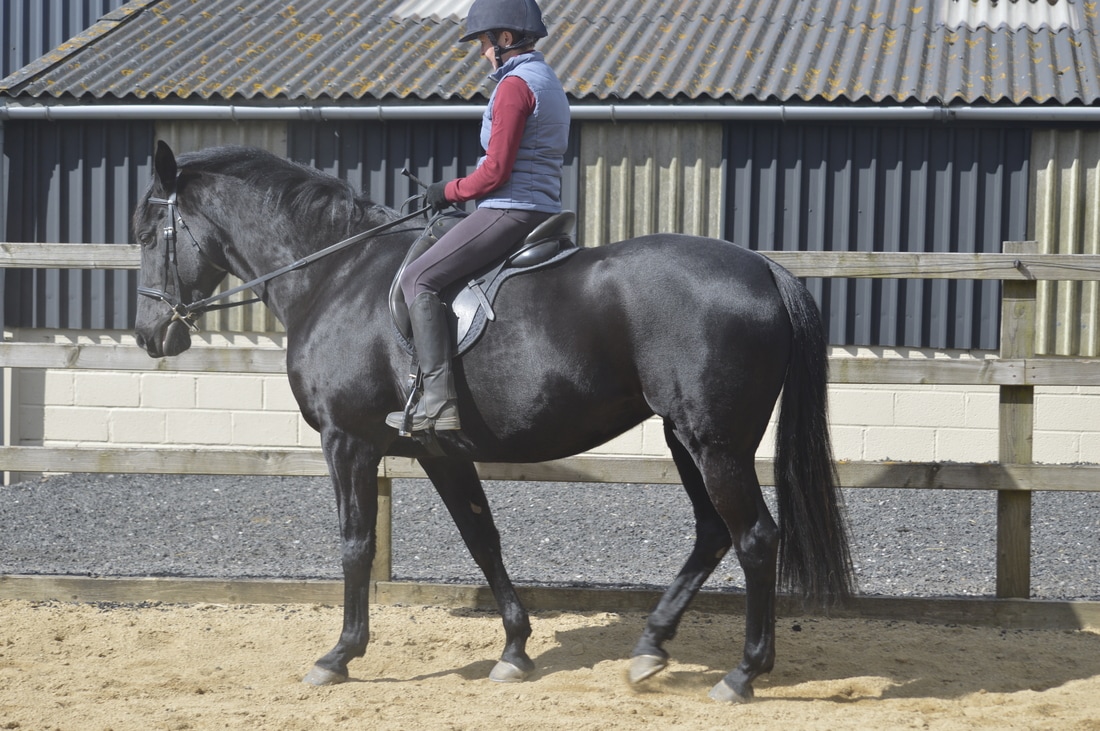
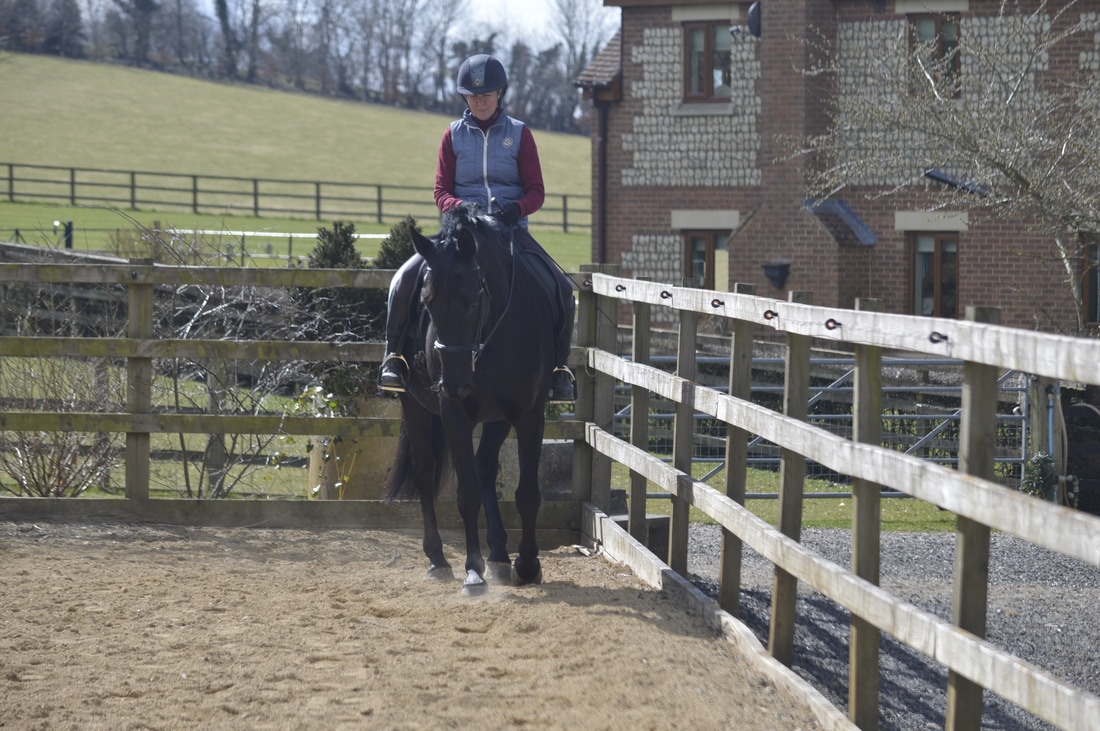
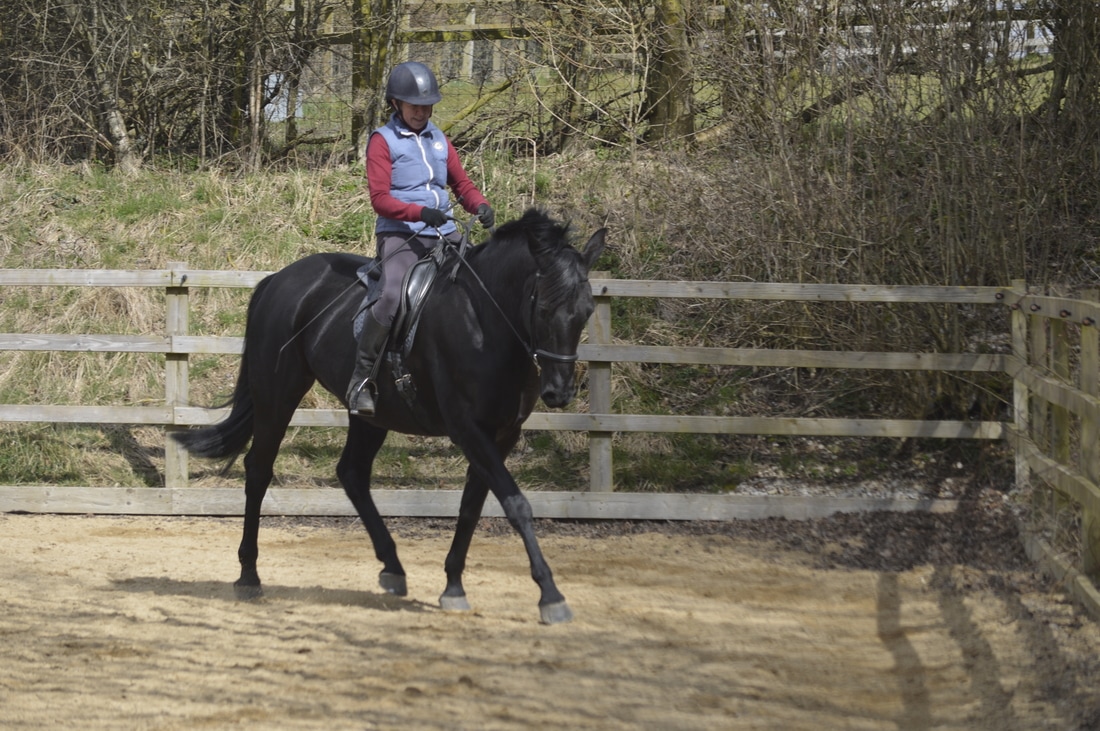
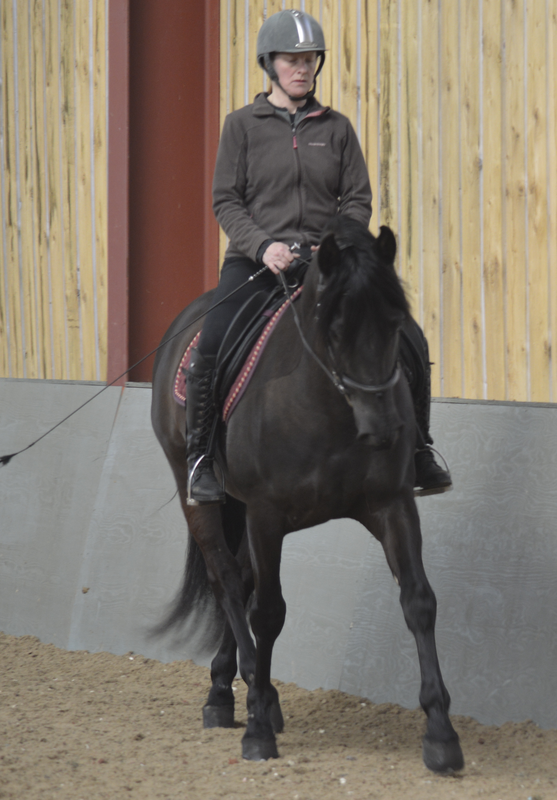
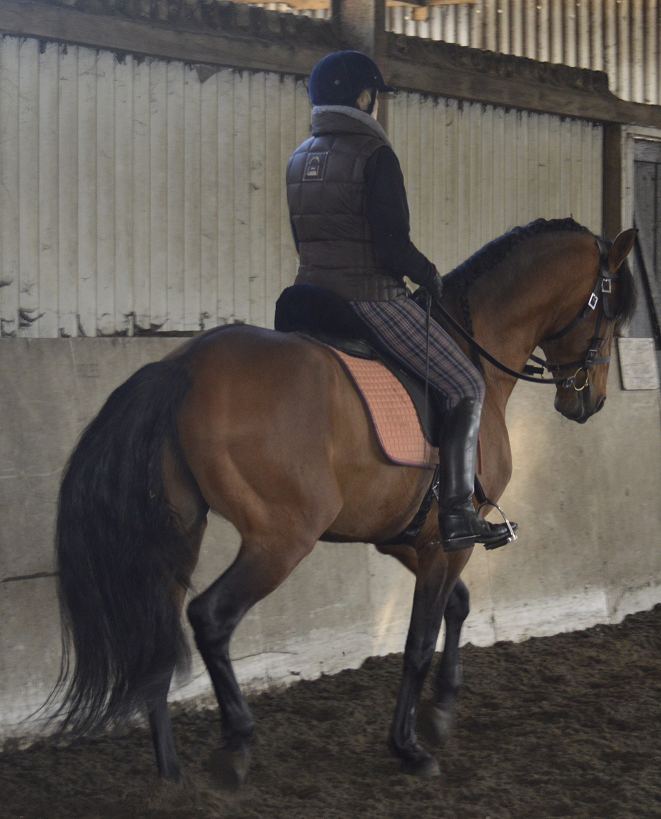
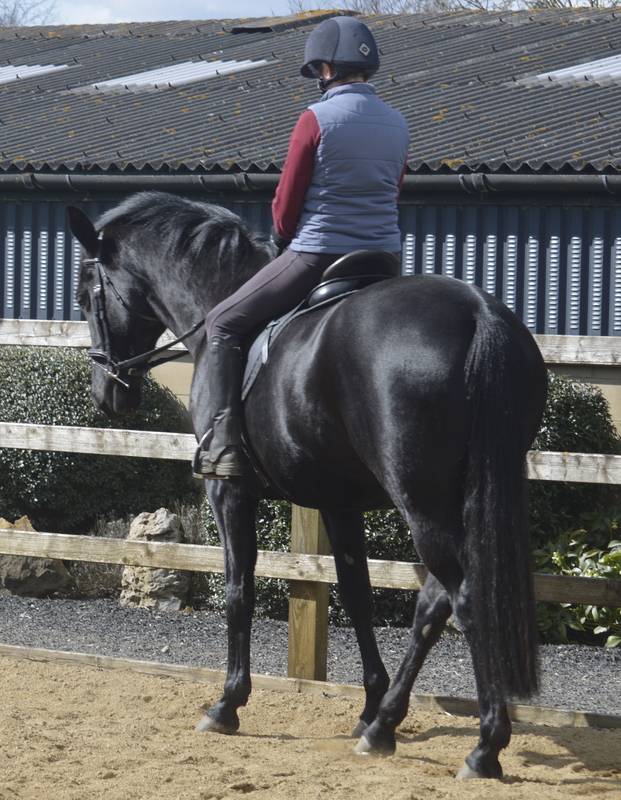
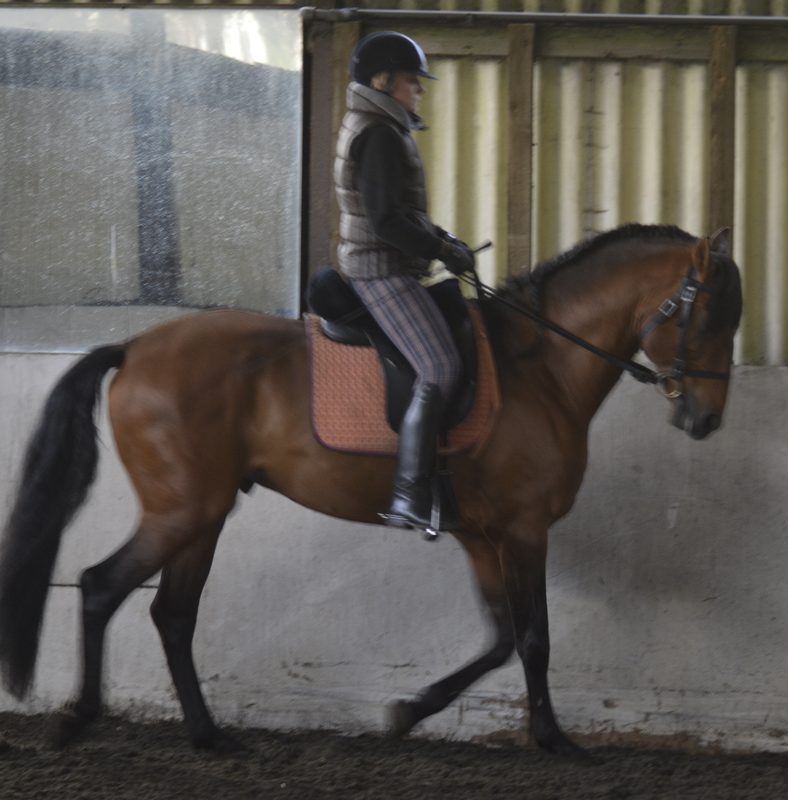
 A word that is often used in relation to schooling horses is gymnastics, and it’s a good description because it creates an image of what we need to do in our training to create a light, balanced and manoeuvrable horse. If you look at a gymnast, they are strong, supple and perfectly balanced, and from that balanced position. They can move in any direction. It’s the same for horses. A horse that is balanced, supple and strong will have a steady head carriage because they are light in the front and the weight is moved back towards the haunches which makes them manoeuvrable. The exercises we use for developing this quality were created centuries ago, defined and refined by subsequent dressage masters. They consist of building the horse through circle work and moving on create suppleness through the lateral exercises; shoulder-in, quarters-in, and renvers, ridden both on the straight lines and on circles. All horses are one sided, left handed or right handed, and it’s the work that you do to encourage the horse to release the stiff side and stretch the soft side that creates a horse who is even on both sides and ultimately straight. Good training develops the qualities of 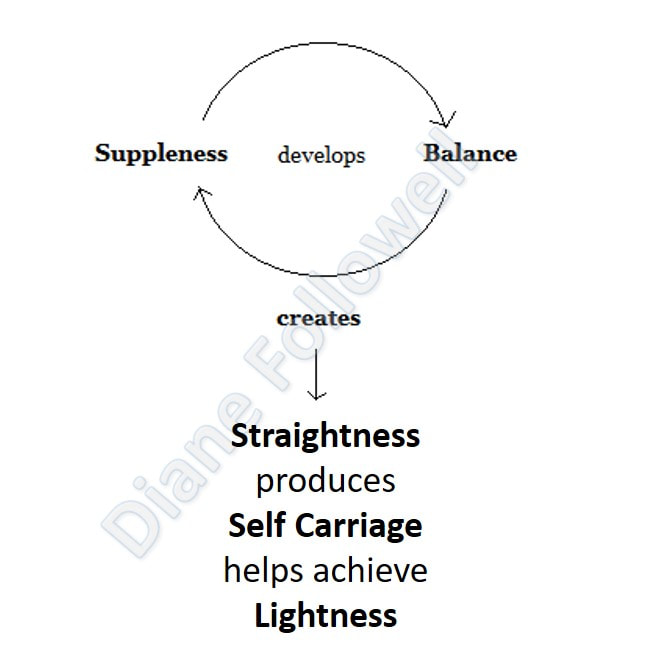 Balance is key to developing self-carriage and lightness. Circles start to create a supple horse and are the first lesson in balance. A correctly ridden circle teaches a horse many things: To give round the riders inside leg To start to engage the inside hind To stretch to the outside rein To develop suppleness in both directions You can feel when a horse is out of balance through the weight in their shoulder, the horse will drift towards the heavy shoulder. On a circle, your horse will drift out when the weight is to the outside shoulder. When the weight is to the inside shoulder, your horse falls into the circle. Identifying a loss of balance In the first picture below, you can see that the horse has lost her balance and put weight in the outside shoulder in order to come round the corner. The second picture shows the effects of this unbalanced corner, as the horse is comes down the straight side of the school crooked. The third picture shows the same horse coming round a corner in balance. The next two pictures show a horse in travers. The first picture shows a loss of balance; you can see the stiffness of the movement over the back and quarters, and weight is in the inside shoulder. You can also see the effect on the rider’s position, pushing her to the outside. In the second picture, the rider has corrected the bend, which has taken the weight out of the horse’s shoulder, and brought the horse back into balance. The horse has moved her weight out of the inside shoulder and this has allowed the hind legs support the weight, the head and neck to soften and the back to lift. Also the rider is now sitting balanced and centred. It takes time to build up enough suppleness for your horse to be able to keep the bend and his balance, but time spent now will be repaid later. If you rush this part of the training, you will have problems in later work and then you will have to come back to this work to make the correction.
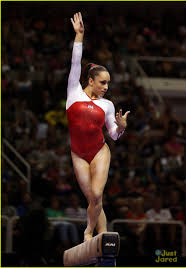 A word that is often used in relation to schooling horses is gymnastics, and it’s a good description because it creates an image of what we need to do in our training to create a light, balanced and manoeuvrable horse. If you look at a gymnast, they are strong, supple and perfectly balanced, and from that balanced position. They can move in any direction. It’s the same for horses. A horse that is balanced, supple and strong will have a steady head carriage because they are light in the front and the weight is moved back towards the haunches which makes them manoeuvrable. The exercises we use for developing this quality were created centuries ago, defined and refined by subsequent dressage masters. They consist of building the horse through circle work and moving on create suppleness through the lateral exercises; shoulder-in, quarters-in, and renvers, ridden both on the straight lines and on circles. All horses are one sided, left handed or right handed, and it’s the work that you do to encourage the horse to release the stiff side and stretch the soft side that creates a horse who is even on both sides and ultimately straight. Good training develops the qualities of 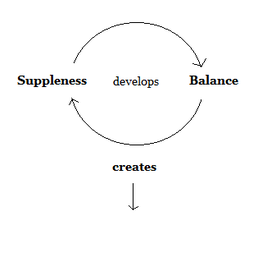 Straightness produces Self Carriage helps achieve Lightness Balance is key to developing self-carriage and lightness. Circles start to create a supple horse and are the first lesson in balance. A correctly ridden circle teaches a horse many things: To give round the riders inside leg To start to engage the inside hind To stretch to the outside rein To develop suppleness in both directions You can feel when a horse is out of balance through the weight in their shoulder, the horse will drift towards the heavy shoulder. On a circle, your horse will drift out when the weight is to the outside shoulder. When the weight is to the inside shoulder, your horse falls into the circle. Identifying a loss of balance In the first picture below, you can see that the horse has lost her balance and put weight in the outside shoulder in order to come round the corner. The second picture shows the effects of this unbalanced corner, as the horse is comes down the straight side of the school crooked. In the third picture the same horse coming round a corner in balance Diane Followell - Training Riders, Transforming Horses
Self-carriage is a quality that results from correct basic work and gives lightness to the horse. A trained horse should be able to maintain self-carriage throughout his work, whereas a younger horse may only be in self-carriage for a few steps before losing balance and needing help from the rider to correct himself. Self-carriage is a combination of balance, strength, straightness and energy, maintained by the horse without intervention from the rider. Additionally the horse needs to be mentally calm and receptive, as a tense horse will be trying to escape the rider’s aids and therefore will not be in self carriage. Developing self-carriage in your horse takes time, carefully working through simple exercises (ref Circles) makes your horse supple, improves their balance which leads to a straight horse, and this is where self-carriage begins. Once the horse is straight and has no weight in the shoulder, you can increase the impulsion which will elevate the forehand. There is a lot of discussion around horses being in self-carriage but the rider must also have self-carriage. An unbalanced rider who uses the reins and grips with the legs to stay in the saddle will create and unbalanced tight horse. A correctly seated, balance rider is able to give clear aids to the horse and remain quietly with their horse when the horse has responded and is performing the movement. The ultimate test of self-carriage is “descent de mains”, where the rider simply opens the fingers, and the horse remains in the same posture, gait and cadence. The pictures below show horses in self carriage (top row). Below them are 3 more of the same horses when they have lost their self-carriage. (All the riders brought their horses into self-carriage again after the photos were taken.) The first horse has fallen through his outside shoulder on a circle, he has lifted his head in order to regain his balance. The bay horse has lost his balance on a straight line, he has dropped onto his shoulder and is leaning on the rider’s hands. The last horse has come off the rider’s inside leg in travers, she has lost the bend and is pressing weight to the inside shoulder. Diane Followell - Training Riders, Transforming Horses
Impulsion is not just the energy required to move a horse, nor is it having a horse going round the school as fast as it can, (that just creates a tired horse), so I am starting this blog with a quote from Nuno Oliveira,
“Impulsion means to maintain the energy within the cadence.” Impulsion is often misunderstood by riders, in dressage it can be your greatest friend or your greatest enemy. Too much energy at the wrong time unbalances and makes the horse heavy in the shoulder. Whereas insufficient energy makes the horse flat and unable to perform the movement you are asking. The right energy at the right time gives a freedom, mobility and lightness to a horse, linking to self-carriage. Impulsion is not a one size fits all, different horses need different levels of impulsion at different times, and it is the skilled rider who knows how much to ask and when. Good impulsion exists when you have a straight horse, supple and balanced with his hind leg travelling straight under his body, the impulsion directs the horse forward and up, lightening the forehand. When the horse has impulsion it is the rider who directs it either upwards to give a collected step, or forwards for a more extended step. With young horses don’t ask too much too soon, begin by asking for a very little lengthening and collecting in trot, in balance, on the long side of the school, retaining the energy from the lengthened steps to the collected steps. As the horse develops his strength and suppleness so the balance improves and the impulsion increases. And a final though on impulsion; don’t ride with more energy than you or your horse and cope with. |
AuthorDiane Followell Classical Dressage Trainer 

|


 RSS Feed
Telephone+44 (0)7931551014
|
info@dianefollowell.com
|
Diane Followell © 2015 -2023. All Rights Reserved