|
Watching competitive dressage at the highest level it’s easy to think that dressage is only for very big moving, talented warm blood horses, but dressage is simply schooling a horse. All horses do some training at some time and whilst dressage may not be their specialty, all can benefit from a basic level of schooling and training to reduce injury and create a responsive, more comfortable horse to ride. It’s easy to dismiss a horse’s ability because he’s a 10 yo who has only hacked out, or has less than ideal conformation, or exhibits behavioural issues, but with a considered training programme issues like this can be overcome. The experience of working with many horses has shown me that with correct training horses can often achieve more than we think. (Have a look at the case studies to see more) By working towards building suppleness and strength through correct development of lateral exercises, all horses can attain the basic lateral movements; shoulder-in, travers, half pass and renvers, in walk and trot. Training must consider the horse’s conformation, along with the work they have previously done, their temperament and natural movement. When the horse is ready, introduce the exercises that build up to more advanced movements, starting with very simplified versions and developing the exercise as far as the horse allows. By identifying the qualities required in a movement, it becomes easier to see that each horse gives a movement its own expression. For example, some horses have a steeper angle in lateral movements because they are naturally more supple than others. By looking to see that the horse has a consistent bend through their body, they do not lean to their shoulders and maintain an even rhythm, every horse can produce a good lateral movement, from a Shire X to a Lusitano to a 23 year old cob. 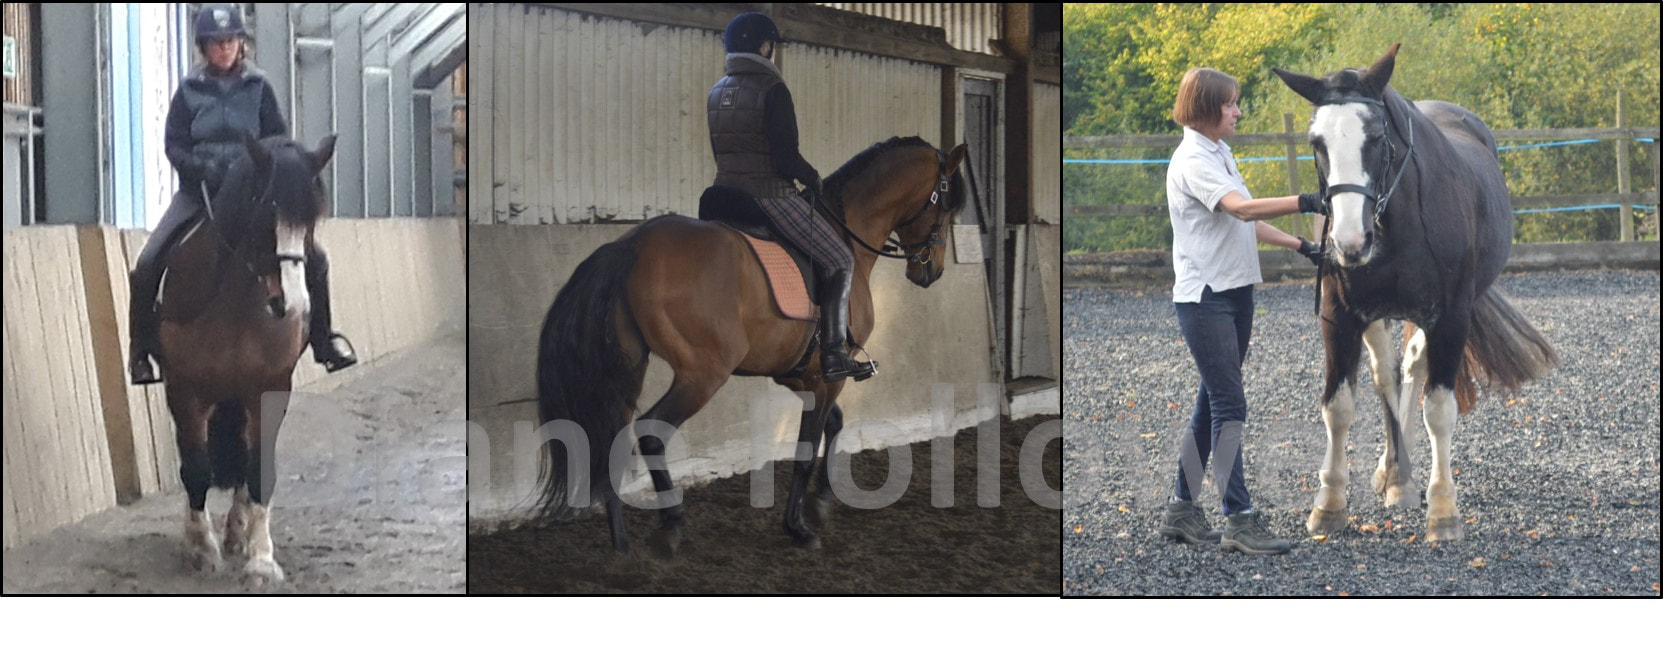 And all the others! Diane Followell - Training Riders, Transforming Horses 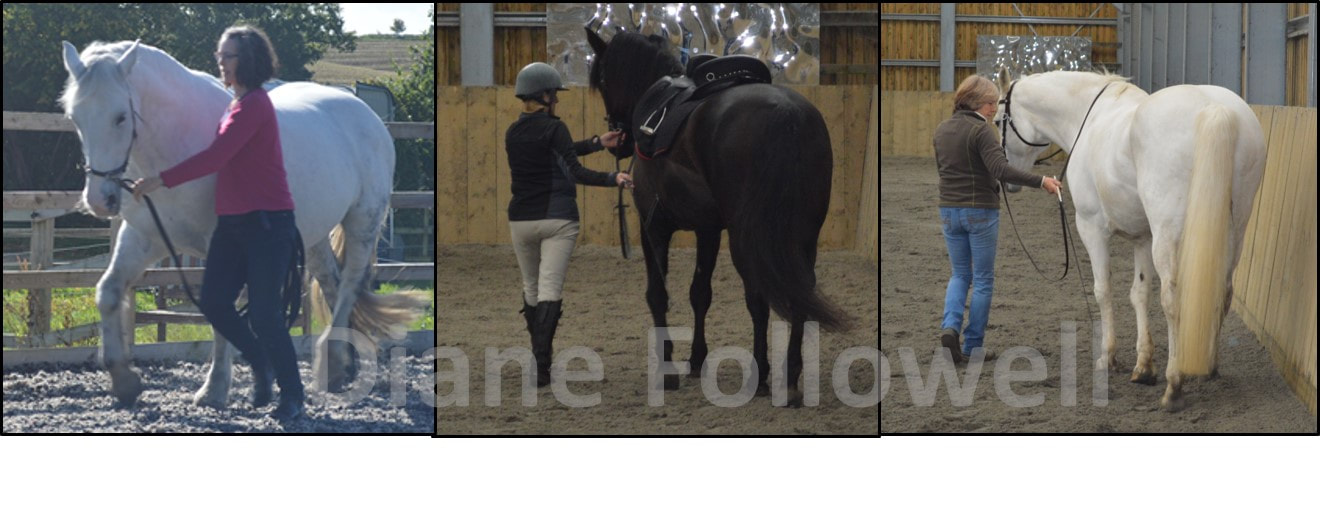 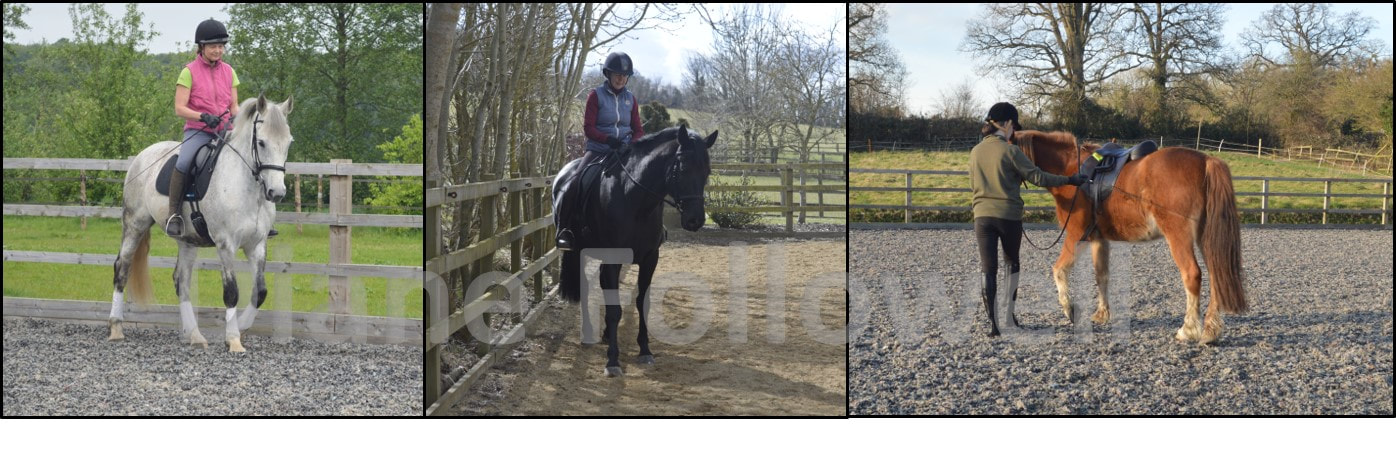 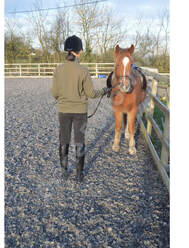 In-hand work is a very useful method for helping horses develop the strength, suppleness and understanding of movements without the added weight of a rider. I also use this technique to help riders with difficulties in certain movements. At the Quinta all our young horses were started using this in-hand method and by developing the basic work in hand before the rider was in the saddle. The whole process of starting the horse was calmer and simplified. They had the strength and balance to carry the rider more easily, and understood the basics; walking and halting, circles, stepping sideways, shoulder-in and rein back. Further on in their training, in-hand work was used to introduce the first steps of piaffe and passage. There are two methods of working a horse in hand, and I use both in my teaching. The first is to work the horse from the ground by using the cavesson and the second is to work them using the reins. I start horses and riders using the cavesson because it is easier for both the horse and rider and is less harsh for the horse if the rider makes a mistake. The model for the pictures is a young pony who is learning in hand work as part of being backed. General Points Use the lunge cavesson and whip with the long end wound up round the whip handle. Stand in front of, and to the side of your horse, so that you can see all of him and he can see past you. The lunge line should be safely looped up and held close to the cavesson. Have your elbow near your side so you can control your horse on the cavesson. 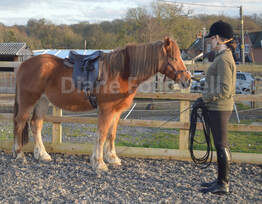 Hold the whip in your other hand. Have the handle in the palm of your hand so you can rotate your wrist, and hold it pointing it down towards the floor when you are not using it, and raise it gently when you use it. Keep yourself on the inside; don’t step across your horse or allow him to step across you. When you are walking, you need to step backwards and at the same speed as he does– but he should not rush past you. Use a light flick on the lunge line against the cavesson to slow him down. Keep your shoulders soft and your elbows bent, a lot of riders let the horse go past them and then they lose control of the horse, or hold their hand close to themselves which draws the horse’s head inwards, pushing the horse towards the outside shoulder.
Some horses are very wary of the whip, so you can use a schooling whip or just your hand if they are more settled like that. 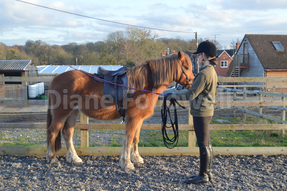 Walking and Halting Stage 1 The first thing to teach your horse is to stop. This is done by gently placing the whip on his quarters but first you need to acclimatise him to this. He already understands the lunging instructions and so start by using these voice directions. Gently encourage him to walk forwards, stepping back at the same time and speed that he does (some horses can be confused when you stand in this position, but gently encourage them to walk and they will move forward.) 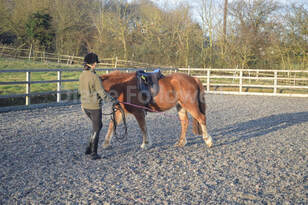 Then, using your voice only, ask him to halt. If he does not stop you can use a small jiggle on the cavesson to help. Try to keep the tension out of your body and just hold the whip softly, pointing down. It’s very important that this work is done calmly and quietly. Your horse will take triggers from your voice, body position and the whip (as well as any noises from outside!) When he has taken a few steps, ask him to halt, again using your voice. You need to stop walking backwards when your horse stops. If you stop before he does he will walk straight past you! When he stops, give him a pat. Repeat this a few times until you are both comfortable with walking and stopping. Stage 2 Now you can introduce the idea that the whip is asking for halt. We do this through 3 steps. Firstly, ask your horse to walk and then ask your horse to halt by the wall or fence. When your horse is quietly standing, very gently raise the whip up and rest it on his quarters. Some horses move away from the whip because they understand that this is what the whip indicates. Quietly lower the whip and ask them to stand again using your voice and repeat the raising of the whip to the quarters. 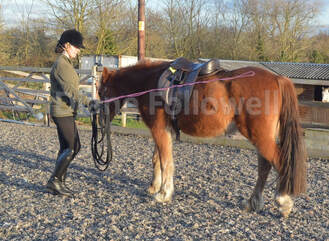 Stage 3
Once your horse is standing quietly from your voice command and doesn’t move when you raise the whip to his quarters, you can start to lift the whip while he is walking. Ask your horse to walk on and then, using your voice ask him to halt and at the same time, raise the whip to his quarters. Repeat this several times until he is quietly halting as you use both your voice and the whip together. You can support this with a light feel on the cavesson, but don’t rely on this aid. If he becomes anxious at any time, go back to the previous step. Stage 4 Once he is stopping confidently from both your voice and the whip, start to bring the whip up before you use the voice command. You are looking for him to stop from the whip movement and your voice becomes a supplement to confirm the action. Look for the moment when your horse stops as you bring the whip up, before it touches his quarters! Some horses pick this up very quickly, whereas others take a few sessions. It’s important that you don’t rush things. This work it takes as long as it takes, especially if both you and your horse are learning together. Again, if at any point your horse becomes anxious, go back to the level he was comfortable with and repeat that step until he is calm again. Common problems that riders find with this technique are:
Sometimes it is because the aid you are giving is too big or the whip is not still.
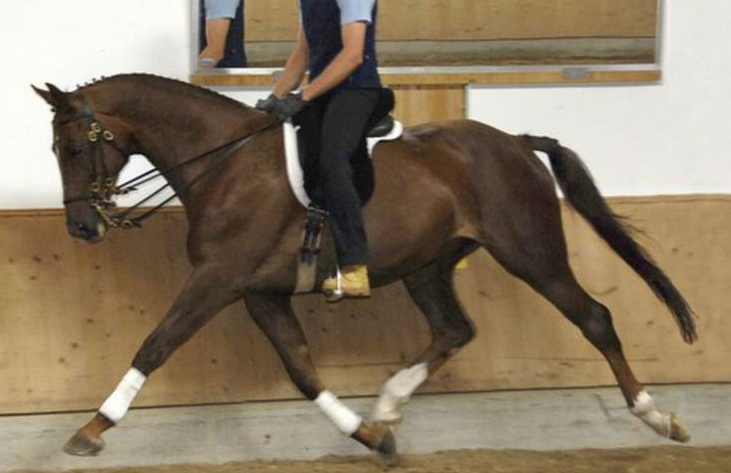
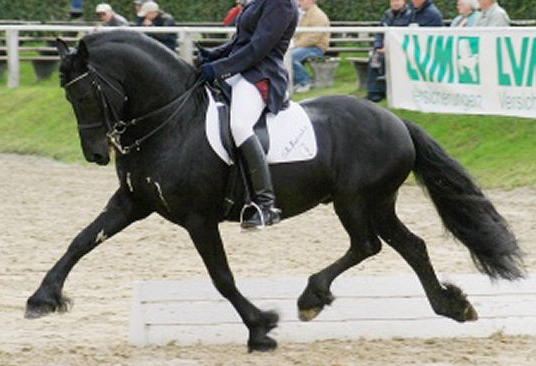
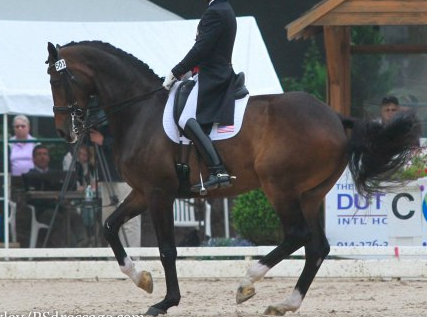
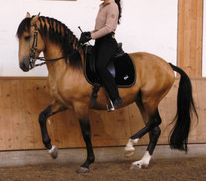
Diane Followell - Training Riders, Transforming Horses Over the centuries, classical riders have studied the work of their predecessors and expanded the understanding of the techniques and skills that have been passed down. Throughout, there is one quality that they all sought to achieve from every horse; lightness. This aspect of a trained horse makes them maneuverable and easy to ride and it should be the focus of every trainer’s work. When you have ridden a horse that is truly light it becomes the most important quality that you search for in your training. Lightness is developed through a steady, systematic approach to using classical training techniques. The horse needs to be balanced and supple, so they can move their weight towards the haunches and develop self-carriage. This involves the horse and rider balancing themselves and working together. Once true self-carriage is achieved, lightness becomes apparent. Lightness brings a softness to the impulsion and a unique expression to each horse throughout their work. The ultimate demonstration of this lightness is “descente de main” or descending the hands. This is where the rider is able to lower the hands, releasing the contact, and the horse remains in the movement, without interference from the rider. This quality has been over-shadowed in today’s competitive dressage world, it takes time and builds on a pre-existing foundation of creating a balanced, supple horse. Nuno Oliveira emphasised the value of working a horse on correct, geometric circles with the weight of the reins being sufficient contact. The rider must have a well-balanced seat and supple back in order to have exact control over the leg, seat, back and hand aids. Developing lightness begins with the early work, centering round applying the training techniques in an appropriate way for each horse. Setting up correct basic foundations starting with circles is the key to the correct progression of dressage. Nuno Oliveira said that horses learn many things when ridden correctly round a circle, as this begins to supple them, places them round the inside leg to the outside hand and starts to engage the inside hind leg. From correct circle work and riding correct corners, shoulder-in develops more easily, and these 3 movements form the basis of dressage and more advanced work. It is worth remembering that when problems occur in advanced movements, they are often resolved by coming back to correctly ridden circles and shoulder-in. In these pictures, the black horses are heavy and blocked in front, whereas the other horse is light. Look at the lengthening of the horse’s frame, rather than the hooves, the contact in the rider’s hands and the position of the horse’s head and neck. In the pictures below, the horses are all in piaffe. The horses in the first two pictures lack lightness, whereas the horses in the last picture show lightness. Notice the rider’s hands and connection to the bit, the position of the withers, neck and head as well as the general outline of the horse. Diane Followell - Training Riders, Transforming Horses
|
AuthorDiane Followell Classical Dressage Trainer 

|


 RSS Feed
Telephone+44 (0)7931551014
|
info@dianefollowell.com
|
Diane Followell © 2015 -2023. All Rights Reserved