 Jill has owned Thomas for several years and they first came to one of my clinics with an interest in doing some in-hand work. Having done some Parelli work together Jill wanted to expand her knowledge and develop new techniques of working horses from the ground. We built on the knowledge they shared with the basic in-hand technique using the cavesson, working on circles and developing side steps and shoulder-in. With the understanding they already had we progressed quickly to shoulder-in on a circle to supple Thomas through his haunches and build his strength. We changed to using the bridle and introduced more exercises to further develop Thomas’s suppleness and strength. Through this work Thomas developed a lovely light shoulder-in. From there we introduced some more demanding exercises such as rein back to trot transitions and shoulder-in to renvers transitions, that were designed to continue to build Thomas’s strength and maintain his suppleness. As this improved we were able to ask for more impulsion in his trot, and carefully developed transitions through rein back to halt to walk, rein back to trot transitions and lengthening and collecting in trot to create a more athletic pace whilst keeping his confidence in the requests. As Thomas’s collection and impulsion improved we worked through smaller trot circles, and trot to halt to trot transitions with attention to detail so he understood the requests and had time to process them. These exercises developed clarity and subtly and encouraged Thomas to engage his haunches as preparation for more advanced movements. Through this work, Thomas lowers his haunches and engages his haunches well, maintaining his self-carriage. Jill is able to release and regain the contact in trot in "descente de mains" and we can now ask for a small piaffe step. The focus was to create a strong supple horse whilst maintaining clarity and subtly with the aids. We continue to develop greater collection in his trot towards more piaffe steps and use the lateral work to develop better self-carriage and cadence in the school walk. There have been times, particularly in the early days where Thomas found the work difficult and it required a lot of patience from Jill to bring Thomas through those phases without creating problems. Through consistent, careful work Thomas is now a strong, confident horse and we are continuing to develop his more advanced work.
Diane Followell - Training Riders, Transforming Horses This is a simple exercise and prepares the horse and rider for shoulder-in. It also develops suppleness, teaches control of the rein aids and places the horse from inside leg to outside rein and developing the on off aids. The exercise is hard to do well and requires consistent riding and aids.
This can be started when your horse is balanced round circle, responsive to your aids, and when you have good control of your leg aids and a balanced seat and soft hands Start the exercise with a shallow bend and then gradually increase the bend as your horse's strength improves. Teach the exercise in walk to give you both time to understand it and then progress on to trot.
Common Problems. Over bending or horse drops to outside shoulder. Usually caused by the rider using too much inside rein. Keep your inside rein light and turn your shoulders slightly to the inside. Your horse moves off track with insufficient bend. It may be that the inside rein is too tight, blocking the inside hind leg from moving, or that your horse has braces their ribs against your leg. Correct this by ensuring that you are correctly balanced, then close your body slightly towards your outside elbow. If your horse becomes very contracted and short, check the balance of your rein aids and, if you are in walk, circle and stretch your horse softening the inside rein. If you are in trot, ride straight forward and ask for a little lengthening with a loose rein Some horses have weak necks, and so their neck moves a lot. Ensure that your inside rein does not take back and support the movement delicately with your outside rein so they move from your inside leg to your outside rein. Diane Followell - Training Riders, Transforming Horses This simple exercise provides many benefits for both horse and rider, creating more suppleness, starting to engage the inside hind, teaching the light connection to the outside rein and beginning to move away laterally from the rider's inside leg.
A basic spiral exercise can be started once your horse understands how to form a correct circle. The circles don’t need to be perfect, but the rider needs to be able to correct any mistakes well.
Variations The variations for this exercise are many, and you can decide what to do during the exercise depending on how your horse feels. One thing that is important to remember is that if you have planned to do a specific series of movements, but your horse does not feel ready, change your plans for something easier. If your horse feels better than you expected, change your plans to something more advanced! All variations improve the connection from inside leg to outside rein if ridden correctly.
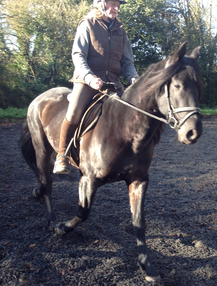 Helen came to me with Andarino for lessons soon after she had bought him. We don’t know much about his early years, except that he was imported when he was 7 and was bought by Helen 4 months later. Andarino is a naturally short striding horse, and he was also very stiff, on the forehand and unbalanced. He also has an anxious nature and when we introduced a new exercise or if he finds the work hard, he curls his neck under or grinds his teeth, but as he has grown in strength, trust and understanding these signs of tension are fewer. 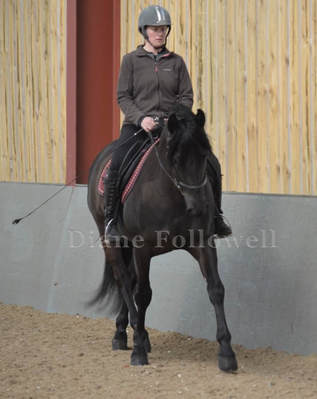 We began his work with basic circles and exercises to build his suppleness and strength, with a program of in-hand work in parallel to the ridden work, which greatly improved Andarino’s balance and created a strong bond between him and Helen. Working steadily through these early exercises we then progressed to lateral movements; shoulder-in, travers, half pass and renvers, to develop his strength and suppleness. By carefully developing the qualities we needed for each stage of his work we began to see the benefits of the exercises: Andarino was starting to use his back correctly, soften and relax his poll with a lengthened neck. We took great care to have the right amount of impulsion for Andarino: too little and he found the movements hard; too much and it pushed him out of balance on to his forehand and caused him to curl his neck under. 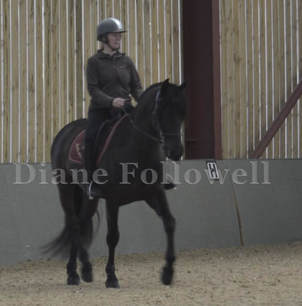 The work progressed through the introduction of rein back, walk to trot transitions, renvers and shoulder-in to renvers transitions and a short canter or a few lengthened trot steps when he was well balanced and in a good rhythm.
As Andarino's knowledge and physical abilities increased, so Helen needed to be quicker and lighter with her aids and more creative with exercises to develop his qualities more. We began to work more on the canter, making transitions at the start of the long side and asking for counter canter; along with developing more collection in trot and riding smaller voltes. It has taken Helen many months of patient riding, but Andarino is now a completely different horse. Through the exercises, he has developed correct muscles, is supple and balanced. We have progressed his training slowly, so he remains confident in what he is doing, and are now working towards more advanced movements. Diane Followell - Training Riders, Transforming Horses 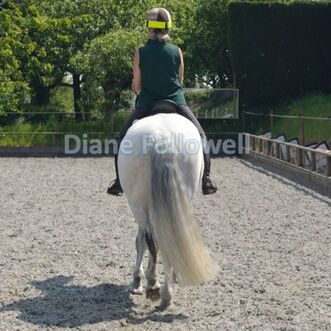 This month’s blog is an exercise that introduces the horse to the idea of stepping laterally away from the rider’s leg. It is a variant of the commonly used leg yield. Both exercises are very beneficial, but the leg yield often becomes a twisted horse falling to the fence rather than a balanced horse stepping across. The side step variant helps the rider to keep control over the horse’s shoulders and encourages the horse to step their inside legs across his outside leg. It has the added benefit of setting horses up for half pass which will come later in their training. To ride side steps, begin by turning onto an inner track on the long side of the school, about 2 m in, and have your horse straight. Gently half halt and use your inside leg slightly back to move your horse to the track on a shallow angle. Don’t press your inside leg, but touch and release. Continue with the half halts to encourage your horse to step across rather than forward. As you do this, support as necessary with your outside aids so that your horse doesn’t fall to their outside shoulder. Don’t use these aids at the same time as the inside aids or you will block your horse’s movement. 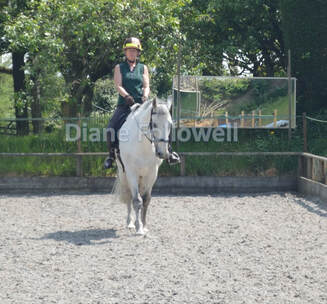 Close your body slightly towards your elbow in the direction you want to go, but don’t shift your seat around.
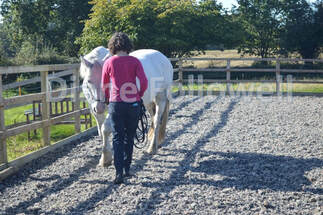
Do the exercise slowly so your horse doesn’t rush and fall to the shoulder. They should remain in balance throughout. Your inside leg has a lot to do, it creates bend, impulsion and directs the quarters. Stepping sideways needs a touch and release with one leg to create the side step, the other leg releases to allow your horse to step over and then gathers to maintain the bend and impulsion. Ask for one step the first time and then gradually build the number of steps as your horse becomes more confident with the exercise. Diane Followell - Training Riders, Transforming Horses 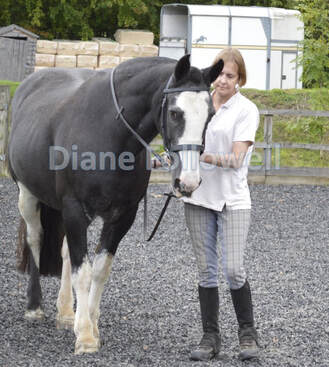 When I first started working with Lucy and her owner, Jane, Lucy had spent several years hacking. During this time, she had done very little schooling and had learnt to fix her neck and shoulder against her rider, making her quite stiff and tight. We took the ridden work back to basics, starting with circle work to give her and Jane an opportunity to work without Lucy fixing her neck and jaw. Alongside the ridden work began a programme of in hand work to help Lucy become more supple and introduce new ideas and exercises in a way that taught Lucy not to fix her neck and to familiarise her with the exercise before doing them when ridden. We began the in-hand work using a cavesson so that when Lucy started to push forward and lean, Jane was able to be firm and keep Lucy’s energy from propelling her onto her forehand. It had an immediate effect in the ridden work where Jane was able to keep a light hand and ride Lucy more from her seat and legs. Once they were both confident with the positioning and aids on circles, we introduced shoulder-in, keeping the angle shallow so Lucy could maintain an even angle with a uniform bend on both reins and not twist her neck or push forward. As the in-hand work improved so did the ridden work. The exercises trained in walk were repeated in trot, and because Lucy was more supple, balanced and responsive, Jane was able to use this flexibility to keep Lucy straight and light. 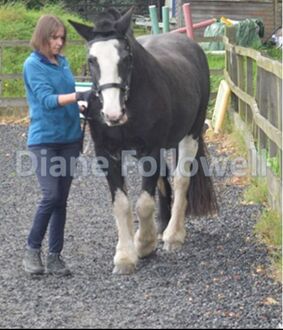 Over the next few months we continued to develop the in-hand work along with the ridden work with shoulder-in through a corner, half pass, renvers (see picture right), rein back and slow trot. Jane’s growing knowledge allowed her to rectify problems as they occurred, so she was able to maintain control without losing Lucy’s confidence. Lucy is light in the hand, she engages her haunches and lightens her forehand holding the movements for herself. Now in her 20’s, and with Jane's dedication to the work, Lucy still performs lateral movements with ease and precision. Pictures below (left) show shoulder-in and (right) shoulder-in on a circle. Diane Followell - Training Riders, Transforming Horses 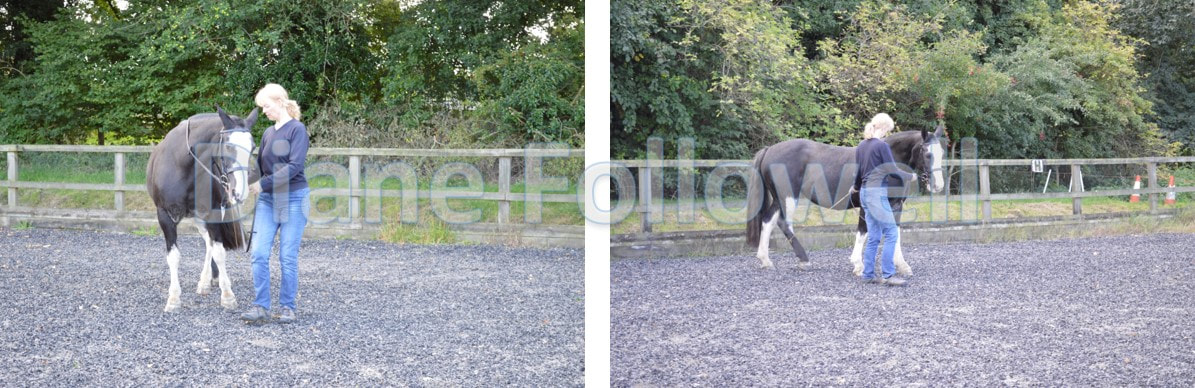 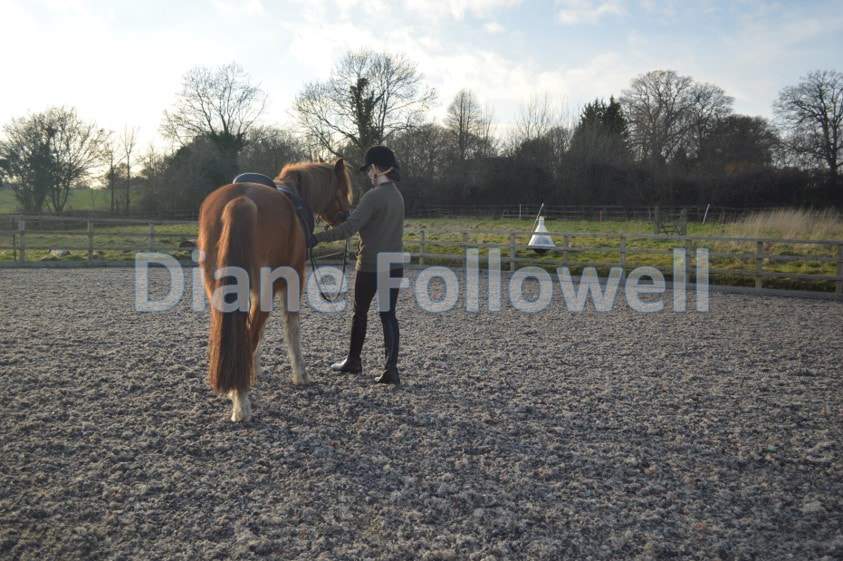 In my blogs earlier this year, I covered how to start working your horse in-hand and how to do circles in-hand. When the circles are balanced and easy, you can begin to ask your horse for some side steps. These side steps teach your horse to move their inside legs across the outside legs as a preparation exercise for lateral movements. Come to the middle of the school and halt with your horse’s fore legs level. If they are not level, walk on and halt again. Then ask for a very small inside bend with the lunge line. Use the whip to gently tap your horse’s inside hind leg until he moves it. You will need to balance him with the lunge line to prevent him from stepping forwards. At this stage it doesn’t matter how much he moves; some horses will lift a small amount, others will pick the leg up higher. Reward him when he moves the leg. If he becomes anxious, go back to some circles and try again another day. Once your horse is lifting his hind leg up immediately when you touch it, you can ask him to step across by continuing to tap his leg once he has lifted it. When he steps it across the other hind leg, immediately stop tapping, halt (whip on the quarters) and reward him. As always, some horses find this easy, others take more time to understand. If your horse is finding it easy, don’t be tempted to ask for too much too quickly. Take time to build his strength and suppleness. If he is finding it more difficult, go back to the work he is comfortable with and then try the side steps just once in each session, and if he doesn’t lift the leg it doesn’t matter. Don’t push things, patiently repeat the aid a little more robustly. Continue to do single steps for a few days until your horse starts to offer the side step straight away, then you can ask for a second and third step. As your horse steps across with his hind legs, you should allow his front feet to follow, crossing round a very small circle. Try to keep your feet moving round a small circle as well, not stepping backwards. If you plant your feet, you will block his movement and he will become twisted and stuck. Take your time. Don’t expect it all on day one. Be satisfied with a calm lifting of the leg for day one and build it over several days; work in your horse’s time. When he is confidently offering the steps, allow him to make the movement for himself, and just make corrections. Diane Followell - Training Riders, Transforming Horses 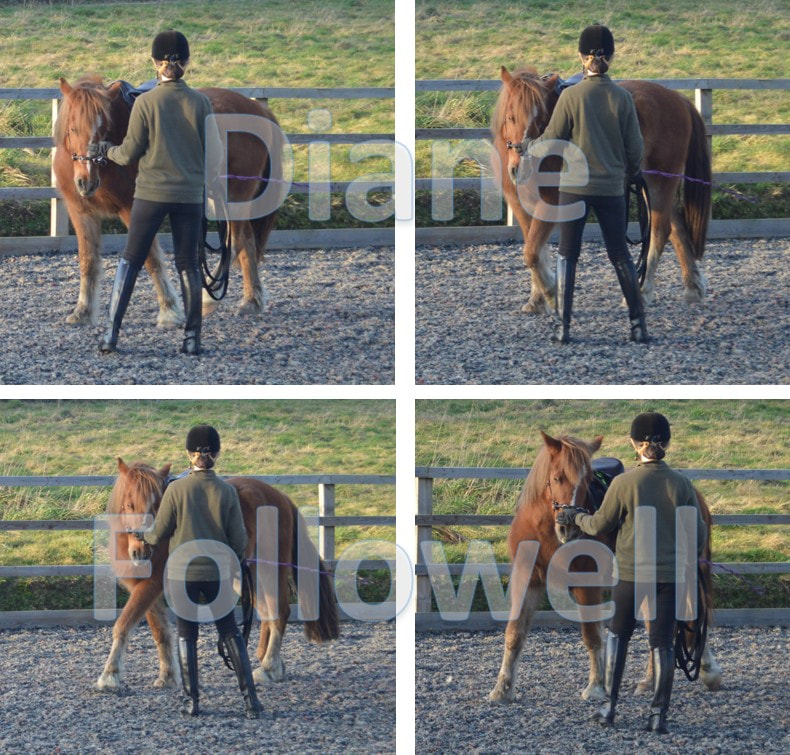  Buddy came to Dee as a 6-year-old who had been used for pulling logs in Ireland. Dee had a good position, but Buddy is a big horse and at that stage he had a limited understanding of the aids and was used to pulling himself forward on his forehand. We began by working on basic circles, ignoring Buddy’s head position on the vertical, and focusing on having correct bend through circles and corners. Dee learnt to feel when Buddy was out of balance by the weight in his shoulders and how to correct this by adjusting his bend. This took a few weeks to become established, but it was important that Dee knew how to feel the issue and how to correct it, so that Buddy became better balanced, and started to develop suppleness in order to bring him out of his shoulders. 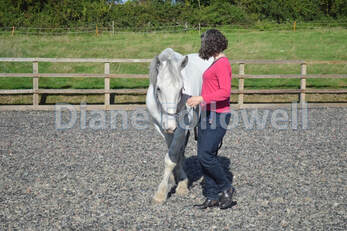 This work was done in walk so that both Dee and Buddy had time to learn what was needed before introducing a few steps of trot. Initially we kept to a jog trot, Buddy had a big unbalanced trot movement and the jog trot allowed them to develop the work done in walk through to the trot. We also introduced shallow quarters out on the circle in walk to further supple him and began a programme of lunging and in-hand work to supplement the ridden work and help Buddy learn some of the techniques he would need for shoulder-in. 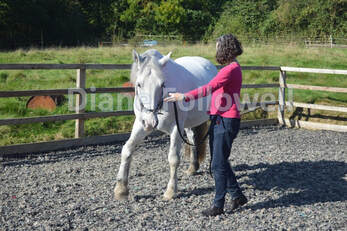 When Buddy was confident doing shoulder-in, in hand, we introduced it as a ridden exercise. He found the shoulder-in to the left much easier than to the right and to help correct this Dee rode some counter flexions on the left rein to bring Buddy off his right shoulder more. Linking exercises together helped to supple and strengthen Buddy, and we gradually increased the impulsion in trot. For example: -
 This type of exercise consolidated Buddy’s existing work, improved his mobility and suppleness, and set things up to start half pass. Using in-hand and ridden exercises we developed shoulder-in on small circles, travers, half pass and renvers, building Buddy’s ability to collect. Rein back was started through the in-hand work and then ridden. Over several weeks it was developed further so Buddy could do rein back to trot transitions, as we continually worked on improving Buddy’s suppleness, strength and understanding. We started in-hand trot work and then developed that on to trot shoulder-in from the ground, creating more suspension in the steps. Dee had to carefully balance her aids - asking for too much collection and Buddy would walk, not enough and he would flatten out - but when Dee’s aids were perfectly balanced, Buddy engaged his haunches more and lightened his forehand in self-carriage. Extended trot steps were developed from the collected trot work to create some ridden lengthened steps, throughout which Buddy maintained his balance, not tipping on to the fore hand. 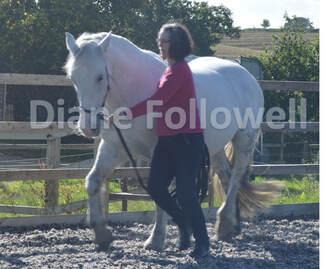 I focused on Buddy’s trot work because that would follow through into his canter. If we cantered too soon, Buddy would not have been able to keep his balance and the result would have been a very uncomfortable experience for both Buddy and Dee. Developing Buddy’s collection in trot allowed Dee to find the best possible moment to ask Buddy to canter, which is light, balanced and collected.
Buddy continue to improve and with Dee’s dedication and consistent approach we are now developing piaffe in-hand with him. Throughout this steady, regular work Dee’s riding improved, Buddy would not let her be anything less than subtle and precise! Diane Followell - Training Riders, Transforming Horses In last month’s blog I wrote about the benefits of in hand work with your horse and how to start and stop when working in-hand. This month covers the next stage, circles. Once your horse is walking on and halting with confidence, you can start to go around circles. Begin by walking on a straight line and then start to bring yourself round the circle and your horse should follow you. 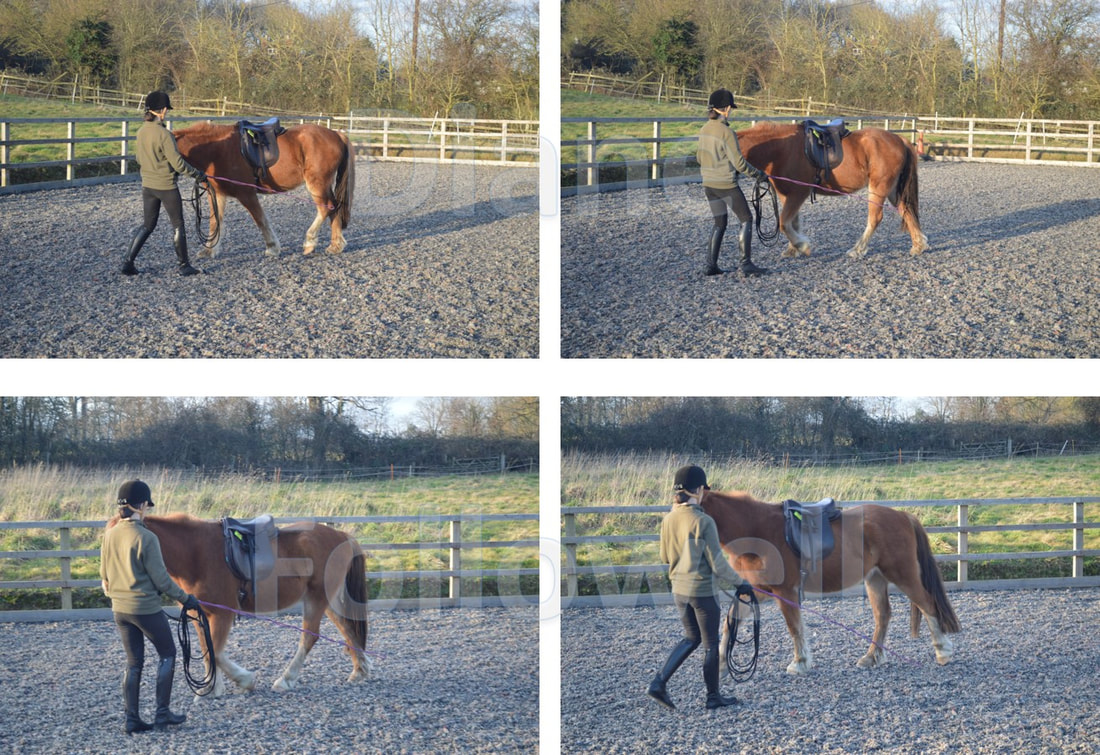 If your horse continues down the side of the school, don’t try to pull him round the circle as this could make him push his outside shoulder out and fall more away from you. Instead, gently indicate to him that you want him to follow you with a soft give-take on the lunge line to bring his head round.
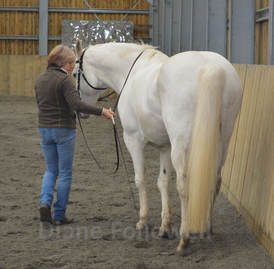
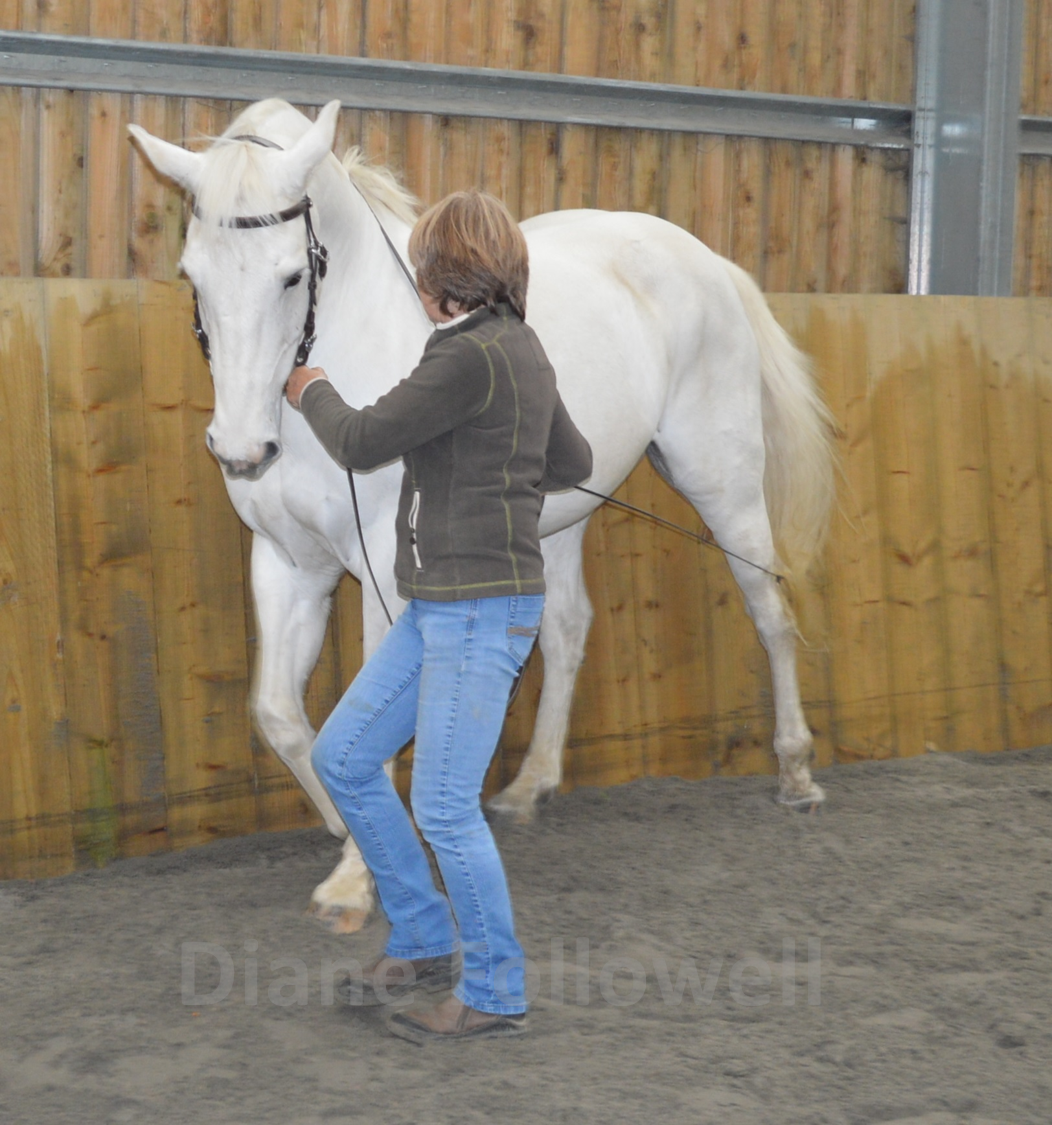
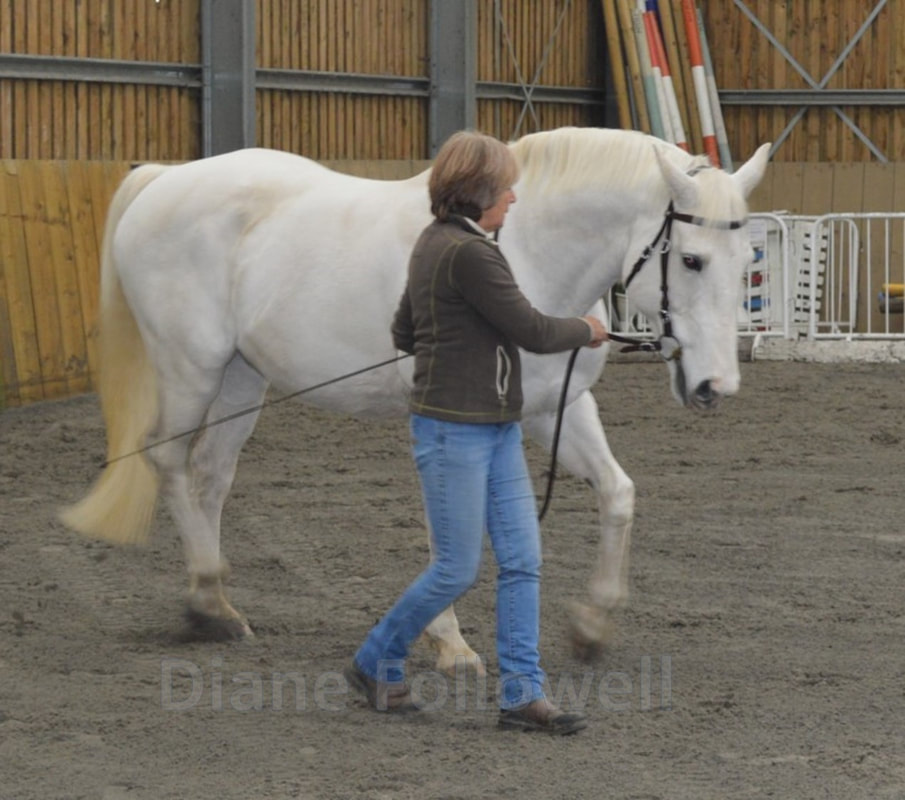
The hardest part is for you to make a correct circle shape, usually riders step to the inside, so move slightly towards your outside shoulder to avoid this. It is important that your horse starts to curve round the shape of the circle, so initially don’t make the circle too small, give both of you a chance to understand what you are doing. Keep your space: if he crowds you by falling in through his inside shoulder, use your hand against his shoulder or the whip gently on his side to invite him to move away. If he drifts away from you, make sure the whip is quiet and gently give-take on the lunge line to bring him round. Keep walking backwards to draw him round the circle. Stay in front and to the side of him. After you have completed the circle go on to a straight line making sure you give your horse enough space between you and the fence, and halt. You can then build up to more circles and, as your horse becomes more supple and balanced, you can make the circles a little smaller. Diane Followell - Training Riders, Transforming Horses 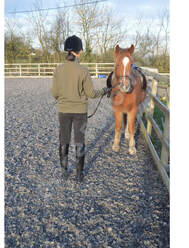 In-hand work is a very useful method for helping horses develop the strength, suppleness and understanding of movements without the added weight of a rider. I also use this technique to help riders with difficulties in certain movements. At the Quinta all our young horses were started using this in-hand method and by developing the basic work in hand before the rider was in the saddle. The whole process of starting the horse was calmer and simplified. They had the strength and balance to carry the rider more easily, and understood the basics; walking and halting, circles, stepping sideways, shoulder-in and rein back. Further on in their training, in-hand work was used to introduce the first steps of piaffe and passage. There are two methods of working a horse in hand, and I use both in my teaching. The first is to work the horse from the ground by using the cavesson and the second is to work them using the reins. I start horses and riders using the cavesson because it is easier for both the horse and rider and is less harsh for the horse if the rider makes a mistake. The model for the pictures is a young pony who is learning in hand work as part of being backed. General Points Use the lunge cavesson and whip with the long end wound up round the whip handle. Stand in front of, and to the side of your horse, so that you can see all of him and he can see past you. The lunge line should be safely looped up and held close to the cavesson. Have your elbow near your side so you can control your horse on the cavesson. 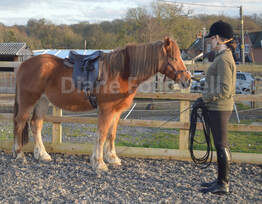 Hold the whip in your other hand. Have the handle in the palm of your hand so you can rotate your wrist, and hold it pointing it down towards the floor when you are not using it, and raise it gently when you use it. Keep yourself on the inside; don’t step across your horse or allow him to step across you. When you are walking, you need to step backwards and at the same speed as he does– but he should not rush past you. Use a light flick on the lunge line against the cavesson to slow him down. Keep your shoulders soft and your elbows bent, a lot of riders let the horse go past them and then they lose control of the horse, or hold their hand close to themselves which draws the horse’s head inwards, pushing the horse towards the outside shoulder.
Some horses are very wary of the whip, so you can use a schooling whip or just your hand if they are more settled like that. 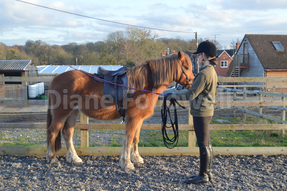 Walking and Halting Stage 1 The first thing to teach your horse is to stop. This is done by gently placing the whip on his quarters but first you need to acclimatise him to this. He already understands the lunging instructions and so start by using these voice directions. Gently encourage him to walk forwards, stepping back at the same time and speed that he does (some horses can be confused when you stand in this position, but gently encourage them to walk and they will move forward.) 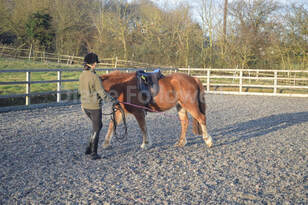 Then, using your voice only, ask him to halt. If he does not stop you can use a small jiggle on the cavesson to help. Try to keep the tension out of your body and just hold the whip softly, pointing down. It’s very important that this work is done calmly and quietly. Your horse will take triggers from your voice, body position and the whip (as well as any noises from outside!) When he has taken a few steps, ask him to halt, again using your voice. You need to stop walking backwards when your horse stops. If you stop before he does he will walk straight past you! When he stops, give him a pat. Repeat this a few times until you are both comfortable with walking and stopping. Stage 2 Now you can introduce the idea that the whip is asking for halt. We do this through 3 steps. Firstly, ask your horse to walk and then ask your horse to halt by the wall or fence. When your horse is quietly standing, very gently raise the whip up and rest it on his quarters. Some horses move away from the whip because they understand that this is what the whip indicates. Quietly lower the whip and ask them to stand again using your voice and repeat the raising of the whip to the quarters. 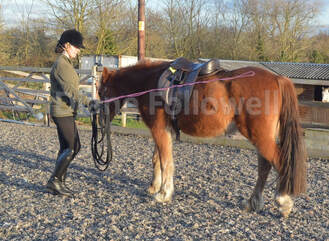 Stage 3
Once your horse is standing quietly from your voice command and doesn’t move when you raise the whip to his quarters, you can start to lift the whip while he is walking. Ask your horse to walk on and then, using your voice ask him to halt and at the same time, raise the whip to his quarters. Repeat this several times until he is quietly halting as you use both your voice and the whip together. You can support this with a light feel on the cavesson, but don’t rely on this aid. If he becomes anxious at any time, go back to the previous step. Stage 4 Once he is stopping confidently from both your voice and the whip, start to bring the whip up before you use the voice command. You are looking for him to stop from the whip movement and your voice becomes a supplement to confirm the action. Look for the moment when your horse stops as you bring the whip up, before it touches his quarters! Some horses pick this up very quickly, whereas others take a few sessions. It’s important that you don’t rush things. This work it takes as long as it takes, especially if both you and your horse are learning together. Again, if at any point your horse becomes anxious, go back to the level he was comfortable with and repeat that step until he is calm again. Common problems that riders find with this technique are:
Sometimes it is because the aid you are giving is too big or the whip is not still.
Diane Followell - Training Riders, Transforming Horses |
AuthorDiane Followell Classical Dressage Trainer 

|
 RSS Feed
Telephone+44 (0)7931551014
|
info@dianefollowell.com
|
Diane Followell © 2015 -2023. All Rights Reserved