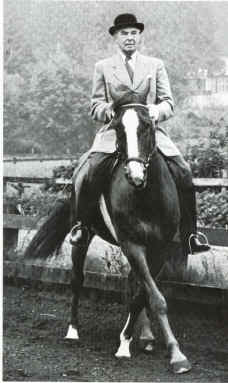
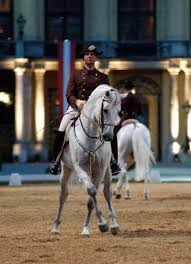
 Alois Podhajski riding shoulder Alois Podhajski riding shoulder A correct shoulder-in benefits your horse in several ways:
But when problems occur the benefits are lost and, in some instances, it can be detrimental to your training. In two of my previous blogs I have addressed some of the problems that can occur with riding shoulder-in: Loss of Impulsion and Travelling and Correcting Bend. When shoulder-in has gone wrong it is usually better to ride out of the movement, set things up again and then come back to the exercise, paying attention to the necessary corrections as you start the movement. 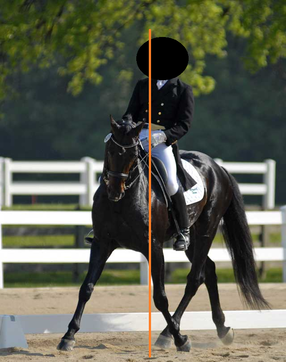 Rider blocking the horse or behind the movement If the rider sits to the inside during the movement, they will be moving against the direction of travel. Closing your body towards the outside elbow helps to maintain correct balance during the movement and release the horse’s inside hind leg, allowing it to cross under the body more easily. Be careful that you don’t sit too far to the outside or you will create a similar problem! Asking for too much angle Only ask for the angle that your horse can manage at that time. The exercise will supple your horse and the angle will increase as they become more supple. Also, be aware of your horse’s conformation; a short coupled, stocky horse will have different angles to those of a narrower horse. Circles and shoulder-in are exercises to supple your horse, and so you must ensure you ride each side the same. On the easier side, ride with less angle, and, as your horse’s stiffer side supples more, the angles will even up and can be gradually increased. Asking too many steps Asking for too many steps before your horse is able to maintain them independently will be physically challenging for him, and he will lose the rhythm and angle. Build the number of steps progressively. Asking for too much stretch It can be tempting to push your horse for bigger steps in shoulder-in, which results in them running on, losing balance and negates the purpose of the exercise. Initially keep the steps small with the hind feet moving close together so your horse builds strength and suppleness. © Training Riders, Transforming Horses
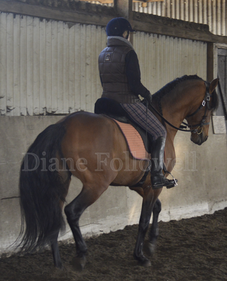 Correct Shoulder-in Correct Shoulder-in Shoulder-in is the basis of all lateral work and provides a foundation for a supple, strong and balanced horse. Throughout the exercise the horse should remain calm, any tension will negate the benefits of the exercise and create a tense horse. For a full description of a correct shoulder-in please see my previous blog “Shoulder-in, correcting problems – loss of impulsion and travelling.” 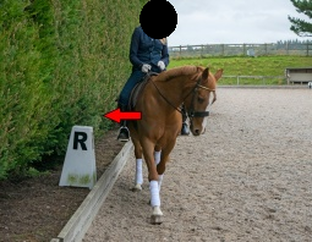 Horse falling through the outside shoulder. Horse falling through the outside shoulder. Problems with the Bend Horse bends neck only and moves down the side with shoulders and hips still against the wall. This problem is often due to the rider not asking correctly, usually by pulling the inside rein back to create the angle. This blocks the horse’s inside hind leg and pulls their head inwards resulting in a stiff, twisted horse. If this is the cause, ensure that you are sitting balanced across your seat bones and not leaning to the inside. Turn your body to the inside, so your shoulders are parallel to the horse’s shoulders and your hips are parallel to your horse’s hips. Then make a small half halt as your horse’s shoulders come off the track and lightly touch with your inside leg to move him to the side. During the movement close your upper body towards your outside elbow so that you go with his movement. Another possible cause is that your horse may not be properly round your inside leg. To correct this, as with many things, you need to go back a level in the training. Work correctly on circles, establishing the bend round the inside leg. Rebalance your hand aids and use outside rein to the neck, not inside rein back, to direct the shoulders across as pulling the inside rein results in blocking the inside hind leg and will push your horse on to the outside shoulder. All horses find it easier to bend on one side than the other, and training should correct this, making the horse equally supple on both sides. Shoulder-in should be ridden with the same angle on both sides so, initially, ride less angle on the easier side so you have control of the movement on both sides. As the work develops, the shoulder-in will become easy on both sides and then the angle can be gradually increased. Riding a spiral is an easier exercise which can help your horse move from your inside leg and supple the inside hind. Begin riding a circle, spiral down to a smaller circle by closing your outside aids, (rein to the neck not backwards), and then move the horse away from your inside leg back out to the large circle. This helps the horse come round your inside leg and begins to teach them to move away from it. Begin developing shoulder-in by asking a very shallow angle so you are in a shoulder fore position, and then increase the angle as your horse becomes more supple so he has the same angle on both sides. 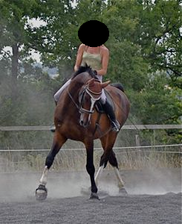 Shoulder in with excessive neck bend Shoulder in with excessive neck bend Excessive neck bend. Over bending your horse from the inside rein produces a shoulder-in that is out of balance which will negate the suppling benefits. In this picture, the inside rein has pulled the head inwards and created an excessive neck bend. To remain in the movement the horse’s weight is being taken by the inside fore leg, and the balance is lost. The outside shoulder is pushed out of the movement twisting the horse and disengaging the inside hind. 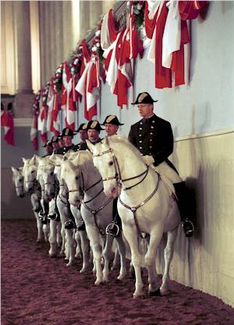 The Spanish Riding School The Spanish Riding School The shoulder-in is one of the most useful exercises for your horse; it supples both the shoulders and the quarters, and brings the inside hind leg under the belly of the horse which helps to engage his quarters and lighten the forehand. Of course, none of this happens if the movement is not ridden correctly. To prepare your horse for shoulder-in Firstly, your horse should be well balanced on a circle and able to move away from the rider’s inside leg. It is usual to begin this with leg yield, but this can make horses twisted. As an alternative either start this using in hand work or do quarters out of the circle. In shoulder-in it is important that the horse is bent throughout his body. The degree of angle will depend on the horse’s level of training and conformation. The exercise should be ridden slowly, and in walk the steps should not be too wide or the horse’s back will become hollow. You should feel the horse’s weight remains on the inside hind, not the outside shoulder. Shoulder-in is created in the corner so your horse should come out of the corner well balanced and in a good rhythm. You should feel as though he is offering the movement to you. If not, continue on a circle and set things up again. If the movement doesn’t go well, ride out of it and start again. It is more important to have a few very correct steps then many incorrect steps. The rider should sit well-balanced in the centre of the saddle. It is very easy to allow your body to tip to the inside, which will unbalance the horse. Move the horse’s shoulders over by a slight movement of the hands to the inside; don’t pull the inside rein as this will block the horse. Using light touches with the inside leg, step the inside hind leg across and use half halts to help the horse stay on the line. Once the horse understands the movement, the rider should stay quiet in the saddle, moving with the horse, and be attentive to the steps, ready to make a correction if needed. Reasons for loss of impulsion or travelling Too steep angle The degree of the angle will depend on the conformation and suppleness of your horse. Have a smaller angle to start with and only ask for two or three steps. Build the number of steps and degree of angle as your horse becomes more supple. Horse not round inside leg In this instance the horse will brace against the rein and either drop to the outside shoulder and travel down the wall with a straight body and twisted neck, or they will step the inside hind leg forward, not across, and then they will travel forward away from the wall. Correct this by riding a very accurate circle to set the movement up again. Keep the inside rein soft and don’t use it to create either the circle or the shoulder-in. Rider not sitting correctly, usually leaning to the inside, or tipping forward. Not sitting correctly puts the horse out of balance; they will not be able to step sideways and the movement will travel forwards. If the rider tries to hold the shoulder-in through the reins, the horse may stay on the side but will be twisted in the neck, not bent through the body. The rider’s position should be slightly turned to the inside (hips and shoulders mirroring the horse’s hips and shoulders), closing the body towards the outside elbow to keep the balance and prevent leaning to the inside. Horse does not bring the inside hind leg under sufficiently This error is very dependent on the suppleness and conformation of the horse. Some horses find it easier to have a large angle in shoulder-in, others (such as a cob) may find the angle needs to be smaller and in this case the hind legs may not cross. What is important is that the shoulder-in is ridden correctly, then it will have a good suppling effect. Horse hollows. The horse will hollow if the steps are too big, or if the rider takes the inside rein as this blocks the inside hind. In shoulder-in the steps should be slow and unhurried; they should be small with the hind legs passing close together particularly in walk. Left below - the horse is falling to the outside shoulder and the rider is twisted Right below - horse is not round the inside leg, is hollow and resisting the rein. © Training Riders, Transforming Horses
 December has arrived, bringing with it the prospect of a joyful Christmas and a New Year full of promise. If you have a few more presents to buy, perhaps you could consider something from one of the many equine charities who’s dedicated work helps rescue abandoned and abused horses or who are focusing their efforts on improving the lives on the many working horses, donkeys and mules round the world. I hope that you have enjoyed the blogs this year and have found the information helpful in your training. I have planned more blogs for 2017, including blogs covering problems that occur in lateral movements and ways to correct them . Wishing you a very happy Christmas and a peaceful New Year. © Training Riders, Transforming Horses
A flying change is where the horse changes the leading leg within the canter. The hind legs and fore legs should change at the same time; if not, they are either late behind, the most common fault where the hind legs change a stride after the forelegs, or late in front where the fore legs change a stride after the hind legs. The FEI requirements for a flying change are;
The most commonly used way to build your horse up to a flying change is to ride across the diagonal and make a simple change through walk at the end of the diagonal. When your horse is familiar with this exercise, the flying change is asked for in the same place. Another common way of teaching a flying change, is to ride true canter down the long side of the school and then make a small 10m half circle, returning to the track on a sharp diagonal line and ask for the change. Whilst both these methods have a degree of success, horses tend to make the change because they are off balance and this technique can also lead to horses refusing to counter canter because it’s easier to make a change of lead. Horses trained this way can become difficult to keep straight through the change particularly in sequence changes. Asking for flying changes on the long side produces straighter flying changes in the horse. Begin by riding around the end of the school in counter canter and make a simple change through walk to true canter at the beginning of the long side. When your horse is well balanced and light in the simple change, ask for the flying change in exactly the same place. Canter on for a few strides and then walk and reward him. Don’t be tempted to immediately repeat the flying change. Go back to counter canter and canter to the same place that you asked for the change and remain in a calm counter canter. The aids should be light; think of it as a canter transition, exactly as you would from walk or trot. Many riders give a very big aid which surprises the horse and then they become anxious during flying changes. Don’t be tempted to pull the reins back as this will block the change and the horse will make a big movement. A flying change should feel as though it is sliding through underneath you more than jumping in the air. Keep your seat moving forward; the temptation is to fold from the waist and tip you upper body forward. Due to the nature of a flying change, it is hard to find a good example in a still photo, but this video has a good example of one time changes at 3.38 https://www.youtube.com/watch?v=F_QlKdNrzAU In the pictures below the horses have made the flying change but the riders have blocked the movement with their hands and given an aid that was much too big and surprised the horse. © Training Riders, Transforming Horses
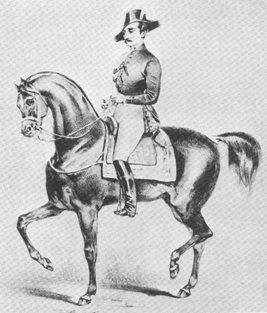 François Baucher was born in France in 1796. As the son of a wine merchant, he was not part of the French aristocracy and it appears that he was never fully accepted by the equestrian masters of his time. In 1810, he was given the opportunity to travel to Milan with his uncle where he was given lessons in equestrianism by Mazuchelli, who used harsh training methods, unlike Pluvinel and the Duke of Newcastle. In 1814, Baucher returned to France to continue with his equestrian career. At this time, French equestrianism had two trends; the classical ménage and outdoor English riding, which was becoming fashionable with the increasing popularity of English thoroughbred horses. This new form of equestrianism was favoured by the Comte D’Aure who would later become an outspoken opponent of Baucher. A few years later, Françios Baucher bought a ménage at Le Havre and took over another in Rouen, publishing “Dictionnaire raisonné d’équitation” in 1833. As his reputation grew, he moved to Paris to work at the circus ménage, an entertainment that was equal to theatre and opera. Over the years his work in the circus and further publications enhanced his reputation. Baucher is known to have used 2 methods of training. The first is primarily about bringing the horse together by simultaneous use of the rider’s legs and hands, bringing the horses head towards its body. However, Baucher continually developed and refined his techniques as he increased his knowledge of training horses, and the most significant change came when he began to engage the horse’s quarters and send them towards the head, now known as his second method. The flexions he used were important to this change; it is not to push the horse onto the hand, but to train the mouth and neck of the horse and send the energy from the quarters towards the mouth. 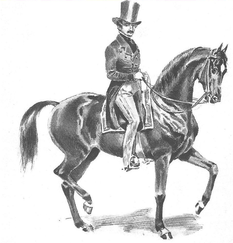 Baucher’s second method shows a tactful rider using gentle bits and spurs, not as a severe punishment, but used with discretion and delicacy, creating vibrant horses and developing new airs such as tempi changes. In 1842, Baucher published ” Méthode d’équitation basée sur de nouveaux principes “. Baucher wanted his horses to be flexible, light and well balanced, and in this work he details the system of flexions he had devised, based on his understanding that resistance in horses can be first felt in the horse’s mouth. He recognised that the most critical area is the horse’s neck and jaw. A horse’s strength is in the hind quarters; the connection between the quarters and mouth mean that any stiffness in the quarters is reflected in the horse’s neck and jaw. The flexions were designed to train the horse’s mouth and supple the neck and poll, giving the rider a very subtle control over the forehand – a technique that requires a trainer with very sensitive hands. This teaches the horse to yield to the lightest pressure from the bit, giving lightness and balance to the forehand. In the mid 1840’s, Baucher’s method of using flexions was introduced to the French army, sponsored by the Duke of Orleans. There were many critics of the method who continued to work behind the scenes to discredit Baucher, and at the death of the Duke of Orleans, Baucher’s methods were replaced by those of the Comte d’ Aure. 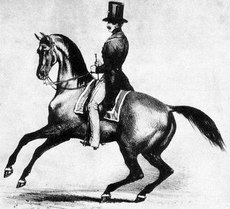 Baucher’s contemporaries disliked the flexions as they felt the horse was in constant tension, but they did concede that the method had remarkable results with problem horses as Baucher demonstrated with Capitaine, a horse considered to be un-rideable, that Baucher trained in 4 weeks. Baucher is known to have been an excellent teacher, but the same cannot be said of his books, as he made many revisions to his works, removing parts that he believed were not relevant or of little use, and replaced them with simpler and more effective techniques. Today, without being able to ask Baucher himself for clarity on his methods, we can only read and reread his books and apply his techniques with tact and discretion. Baucher was involved in an accident in 1855 which resulted in his legs becoming weaker, and he no longer rode in public or wrote books, but continued to work on his method, teaching dedicated pupils and leaving them to carry on his work. Today Baucher’s method is still controversial, but, in intelligent hands, it produces the lightest, most agile and responsive horses. edit. © Training Riders, Transforming Horses
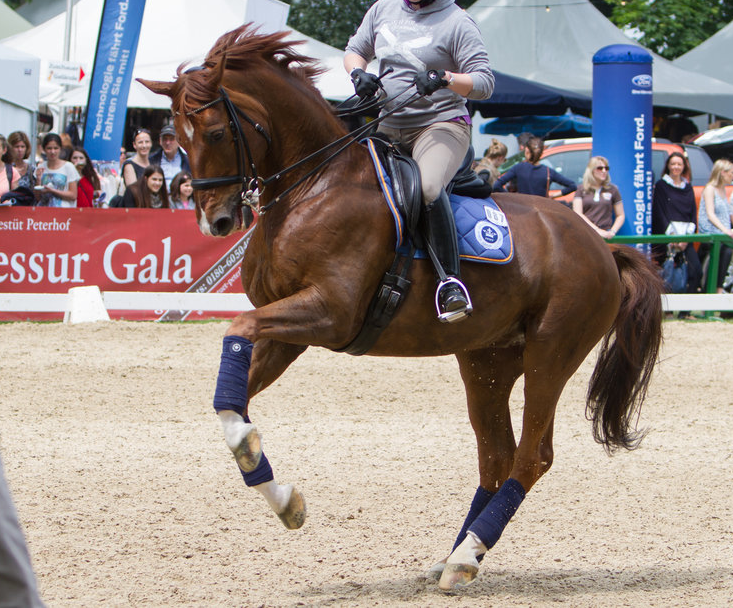
 The half pass is a movement where the horse travels diagonally away from the line of travel. The horse should be bent in the direction of the movement and the outside legs cross in front of the inside legs giving a series of steps carrying the horse forward and sideways along the diagonal line. A half pass should have a lightness and fluidity of movement, where the horse remains engaged on the inside hind and soft on the inside rein. At the end of the movement, the horse should be bent round the rider’s inside leg and connected lightly in the outside hand – very often the opposite is seen. The FEI requirements list the essentials of half pass as:-
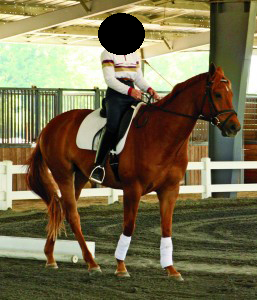
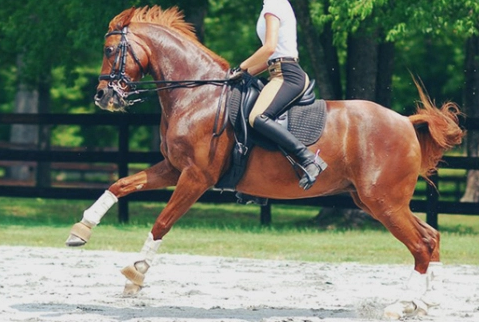
The rider’s position is critical in enabling the horse to perform a correct half pass. The rider’s inside leg creates impulsion and maintains the bend, and their seat should remain level. Closing the body towards the inside elbow will place the rider’s weight correctly to the inside allowing the horse to easily step across. The aids from the rider’s legs are important as they must alternately touch and give. Using both legs at the same time confuses the horse. Arthur Kottas and Nuno Oliveira both comment on this. Kottas “The inside leg first gives the bend, then the outside leg, a little behind the girth pushes the haunches intermittently towards half pass” Oliveira “In half pass, the inside leg gives the flexion. Get the flexion first then use the outside leg. Be very attentive to your inside leg. You must push with one leg and stay quiet with the other or the horse will be confused. I remind you, when you work with one leg stay quiet with the other.” The most common error that riders make is to pull the inside rein back to create the bend. This action blocks the horse on the inside, inhibiting the movement to that side, and then the rider must use excessive outside leg to push the horse across. In addition, these actions put the rider’s weight to the outside, further preventing the horse from stepping into the half pass. You should begin to train half pass when the horse is confirmed in a good quality shoulder-in and can maintain this from the long side of the school to the centre line. With some horses, you can ask half pass directly from the shoulder-in, but with others it can be helpful to straighten out of shoulder-in for a step, whilst maintaining the bend, and then ask for a step of half pass. Initially only ask for 1 or 2 steps, the quality is far more important than the quantity. When the horse understands this, gradually ask for 1 or 2 more steps. At first glance, the half passes in the pictures below look correct, but if you look closer, you can see that the chestnut horse is out of balance. The rider’s inside leg has come away from the horse and the inside rein is being used to create the bend. The rider’s outside leg then has to do too much to move the horse across which impacts the rider’s position. You can clearly see the rider on the chestnut horse is leaning to the outside of the half pass which is making the movement harder for the horse. Some horses are athletic enough to perform the movement anyway, but it produces a stiff truncated half pass. © Training Riders, Transforming Horses
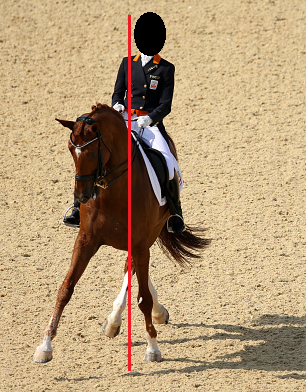
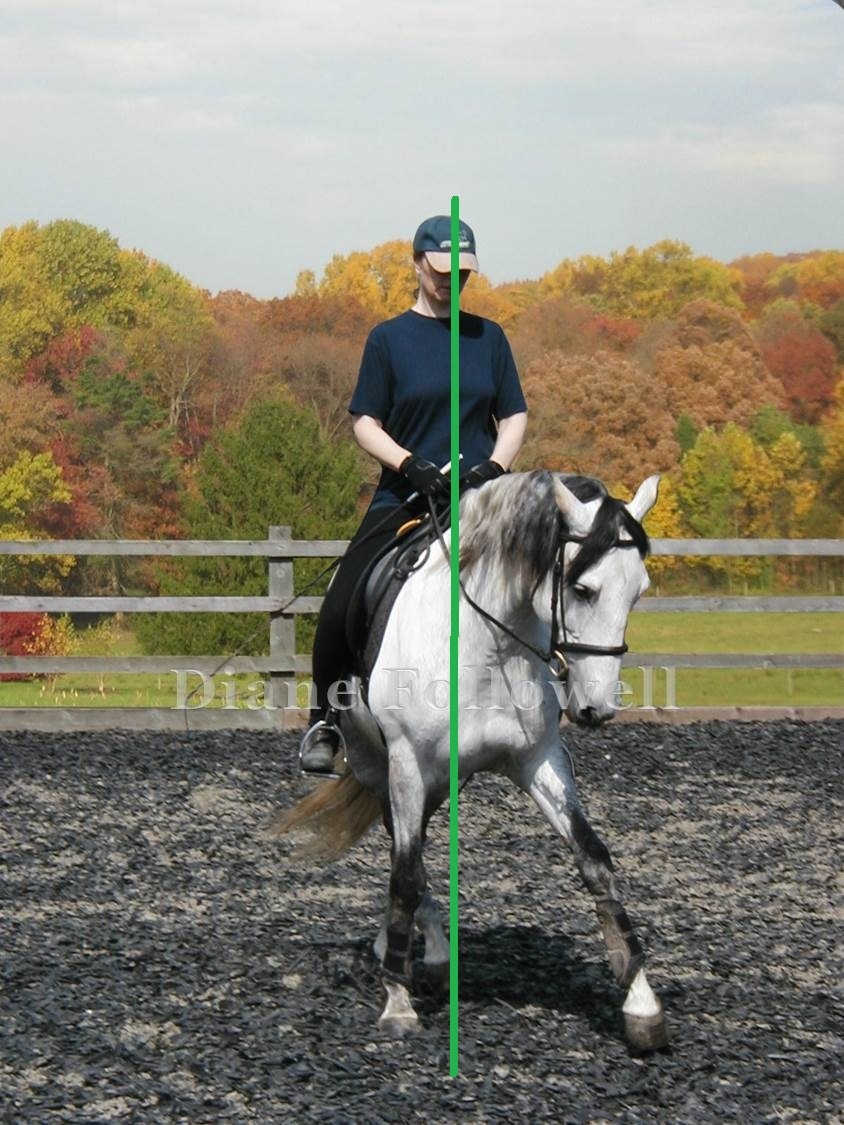
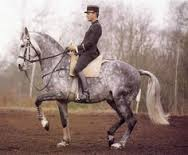
The Olympic Games presents a great opportunity for us to indulge in watching wonderful horses perform in the dressage arena, but how can we best appreciate the performances when the same movement on horses with very different training, conformation and expression in their paces can appear quite differently? By looking for the qualities of a movement it becomes easy to compare different types of horse. An example of this is extended trot. In extended trot, warmbloods with big movement tend produce a big, expressive step, whereas an Iberian horse will show a less visually spectacular pace, however this does not mean that the Iberian extension is incorrect, or that the Warmblood extension is perfect. So how can you identify a correct movement? An extended trot is described by the FEI as follows; The aim is to show the utmost impulsion in trot strides with as much lengthening and ground cover as possible without a loss of balance. The regularity of the two-beat rhythm with still longer moments of suspension than at medium trot.
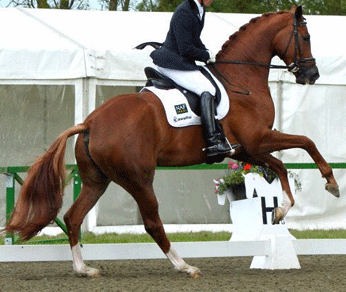
One of the key phrases in the description above is “with as much lengthening and ground cover as possible without a loss of balance.” This accepts that each horse will have a different expression depending on their conformation. In extended trot I look at the movement of the horse’s shoulder, which should be free moving and the foot should be placed at the furthest point of the extension and not drawn back. Looking at the hind leg you should see an equal suspension and length in each of the diagonal steps. The neck position is also important. Extended trot requires the horse’s neck to be lengthened and the head may come slightly in front of the vertical. If the neck is shortened, the withers will drop and the shoulders and back are blocked. The pictures below show two breeds of horse both doing an extended trot. They are moving with a free shoulder, the fore leg carrying the reach through the forearm and the foot lowering at the farthest point of the reach. The neck is long and rises up from the withers. The horses back is not blocked and the hind leg is correctly reaching under the body. The grey horse has a shorter more upright conformation than the other horse, but both extensions are correct, showing a lengthened frame and free shoulder and back. At the other end of the scale is piaffe which is another movement in which it is easy to compare different horses. The FEI description of piaffe describes the qualities that should be present; The aim of piaffe is to demonstrate the highest degree of collection which giving the impression of remaining in place. To perform the movement with forward intent while maintaining clear diagonal steps.
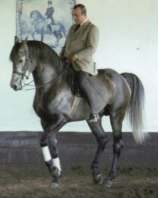
To compare piaffe in different horses, focus on the hind legs. The height and suspension should be the same in both legs, and the feet should be placed on the ground in line with each other; sometimes one hind foot is placed further back than the other. In the forehand, the legs should lift to the same height on each side, and should be under the shoulder when on the ground, not back under the body of the horse. The neck should be raised from the withers in a graceful arc. Some horses have a more closed head and neck position than others, which is appropriate, providing the rider is not restricting the forward movement with their hands.  In the pictures above the horse on the right is showing a greater degree of flexion in the hocks and lowering of the quarters than the horse on the left, but looking at the qualities of the piaffe, they are both correct. Correct dressage training should result in a strong, supple, well balanced horse who takes weight towards the hind quarters and remains light in the hand. There should be an overall quality of lightness in all work which is the result of self-carriage. There should be no tension in the reins, with the ultimate expression of this lightness in “descente de mains”, where the rider is able to lower the hands, releasing the rein contact and the horse remains in the same frame and movement. © Training Riders, Transforming Horses
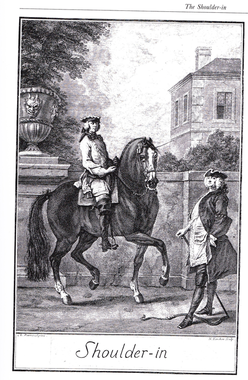 François de la Guérinière was born in France in 1688 shortly after the death of William Cavendish. De la Guérinière was the director of an equestrian establishment in Paris for 15 years, and in 1730 he was appointed director at the Manege of the Tuileries, home of the royal equestrian academy. He held this position for over 20 years until his death in 1751. During this time he wrote “The School of Horsemanship” and the complete book was published in 1733. Building on the work of previous masters of dressage, he developed shoulder-in on a straight line, which he states is the “alpha and omega of all exercises”. The School of Horsemanship is over 300 pages and covers all topics of equestrianism from naming the parts of the horse, to feeding and grooming to surgical procedures – not all of which we would agree with today! However, the section on training covers about 80 pages and is still very relevant for today’s rider. He begins with discussing the correct riding position and how it is important for the rider to be able to give correct aids and remain in balance with their horse. He observes that there are riders who have not spent time developing a good posture to the detriment of both the horse and the art of riding. It is important to note that he agrees with William Cavendish that different horses need different training depending on the temperament, conformation and intended final use of the horse. He views dressage as an art and throughout these pages he often refers to the need to observe the horse and train according to the nature of the horse. The qualities of a well-trained horse are suppleness, obedience and precision, as this horse is able to respond to the rider with ease and grace, and has no difficulty responding to the rider. The section dealing with the hands and reins is slightly more difficult to transpose into today’s riding as he describes the use of a double bridle with the reins held in one hand, however there are some important details that we can learn from his description. He writes at some length about the action of the hand; a rider’s hand must be light, gentle and firm. A gentle feel being the primary contact, moving to either lighter of firmer, depending the aid needed, but always returning to the gentle contact. He is adamant that the hand should never move directly from a light contact to firm contact as this is too abrupt for the horse’s mouth and will provoke a resistance. He defines the role of the rider’s leg as being used to control the body and quarters of the horse. A very long straight leg position with the lower leg resting close to the horse, with the thighs and calves turned inwards. So far, so easy, but he then says they must “be held firm in addition to being relaxed, for if they were not they would touch the horse’s belly incessantly, which circumstance would put the horse in a continual state of confusion.” The remainder of this section gives a lot of other information. The timing of aids is important, as is the stillness of the rider in relation to the horse and the need for clarity in everything the rider does so as not to confuse the horse. A well-timed, mild correction is most effective, as it preserves the good will of the horse, observing that horses make mistakes from misunderstanding or weakness, and if the trainer punishes them though anger or frustration it is likely to make the horse resistant to the rider, rather than respectful. Trot was used extensively to build suppleness in horses, as this pace has a natural impulsion and uses all the muscles of the horse. The trot should not be used excessively, as the horse needs to have sufficient strength and energy in the work, and should not be worked until he is tired. 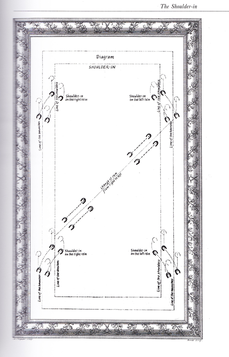 Famous for developing shoulder-in, de la Guérinière dedicates a chapter to the movement. He found that Cavendish’s exercise of quarters out on the circle created supple quarters in the horse, but could place them onto the forehand. It was this observation that led him to develop shoulder-in. He used shoulder-in to develop circular suppleness in the shoulders of the horse, which is needed to make turning easier and for lateral movements. He lists the benefits of shoulder-in as;
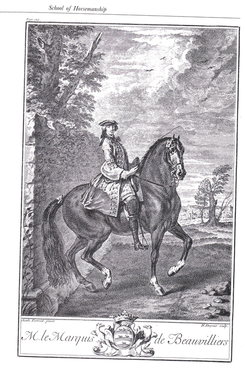 Following the work in shoulder-in de la Guérinière then moves on to croup to the wall, whereby the horse moves with the quarters towards the wall and the shoulders away. The horse should be curved round the rider’s leg in the direction of the movement. However he advises that circles are still of benefit during all training, as they keep the horse supple and forward and can be used to refresh the horse after difficult exercises such as shoulder-in. De la Guérinière uses this movement as a natural progression from shoulder-in. The book also covers passage, turns, changes of hand and offers some exercises and work patterns for riders to use. Interestingly, he comes to the canter work late in the book. He agrees with other trainers of the period that horses should only canter once they have been made supple in the trot, so they do not lean on the reins. (I use correct trot work to improve a horse’s canter work.) De la Guérinière advised cantering only after “the horse is supple in its entire body, trained to the shoulder-in and croup to the wall, and is accomplished in the piaffe between the pillars” and then they will canter easily. The canter should be short and energetic and created through impulsion, half halts, and “descente de main” (lowering of the hands and releasing the contact while the horse maintains the position). De la Guérinière deals with the various problems that a trainer may come across in canter, covering how to work horses with differing conformation and ability. 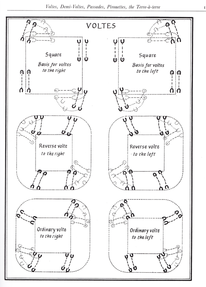 The final chapters deal with the voltes, pasades, pirouettes, terre-a-terre movements and the airs above the ground with a short paragraph dedicated to each. When you pick up a copy of The Manual of Horsemanship it is a bit daunting to start to read, but see what you can glean from it. The first reading can be perplexing, but if you reread it you will begin to gain huge insights into classical techniques for training horses. De la Guérinière’s legacy is that of a progressive training system, in line with the horse’s natural abilities, seeking to develop a light, calm and responsive horse. Although his book was written nearly 300 years ago, it is much easier to read than earlier books and the advice he gives on training horses is still applicable, and the criticisms he makes shows that there have always been conflicting ideas in the dressage world! © Training Riders, Transforming Horses
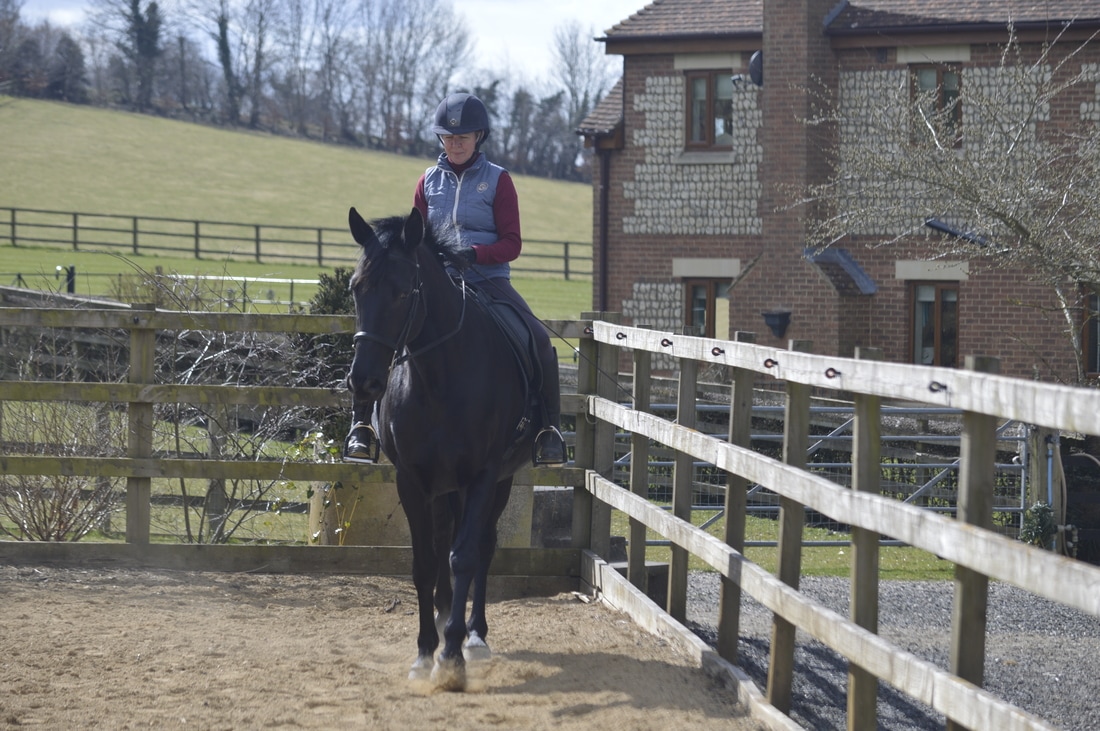
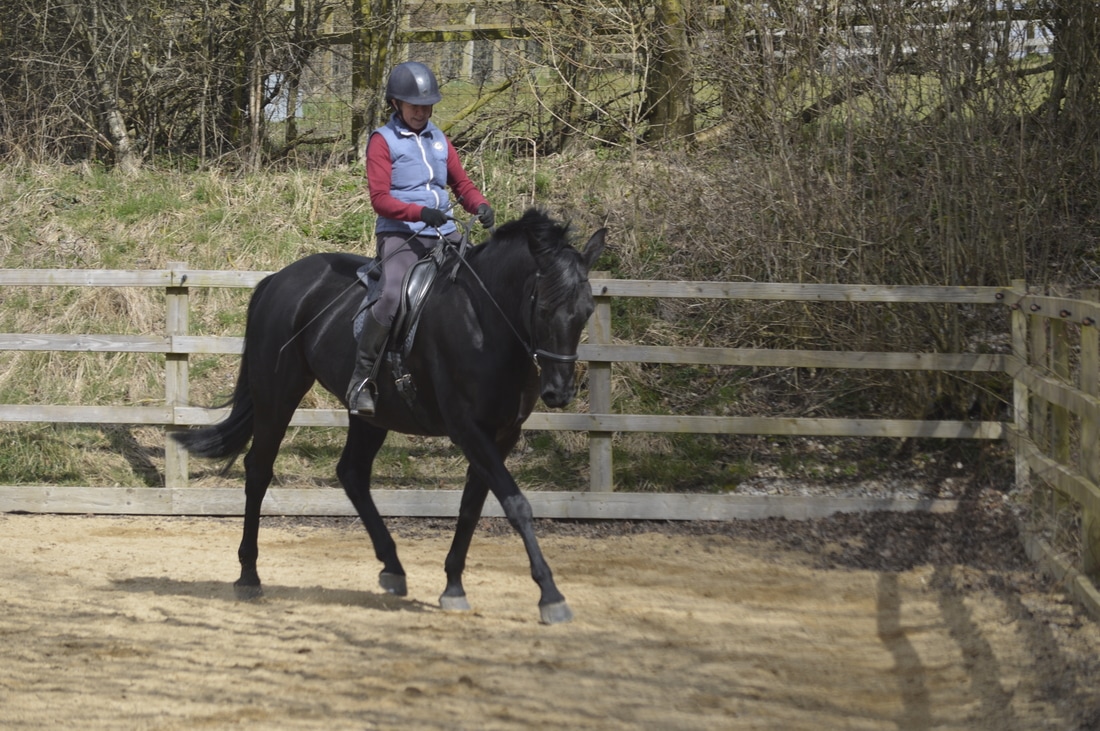
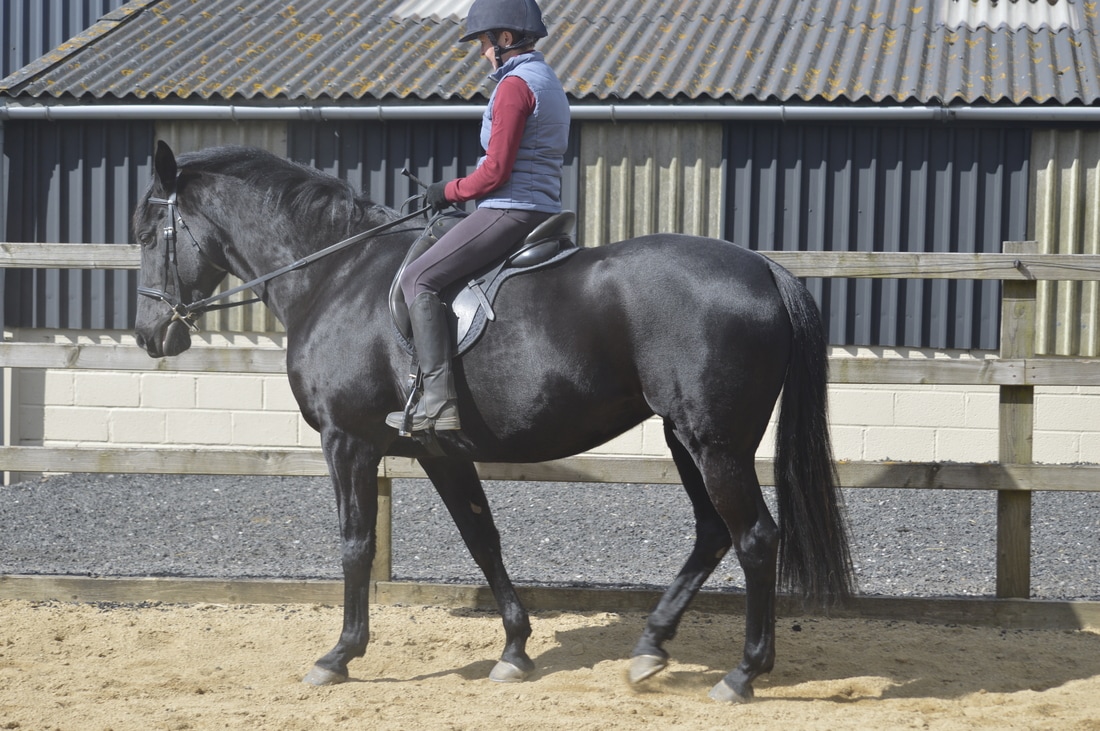
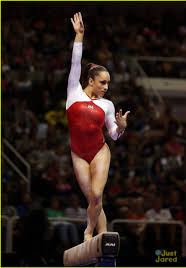 A word that is often used in relation to schooling horses is gymnastics, and it’s a good description because it creates an image of what we need to do in our training to create a light, balanced and manoeuvrable horse. If you look at a gymnast, they are strong, supple and perfectly balanced, and from that balanced position. They can move in any direction. It’s the same for horses. A horse that is balanced, supple and strong will have a steady head carriage because they are light in the front and the weight is moved back towards the haunches which makes them manoeuvrable. The exercises we use for developing this quality were created centuries ago, defined and refined by subsequent dressage masters. They consist of building the horse through circle work and moving on create suppleness through the lateral exercises; shoulder-in, quarters-in, and renvers, ridden both on the straight lines and on circles. All horses are one sided, left handed or right handed, and it’s the work that you do to encourage the horse to release the stiff side and stretch the soft side that creates a horse who is even on both sides and ultimately straight. Good training develops the qualities of 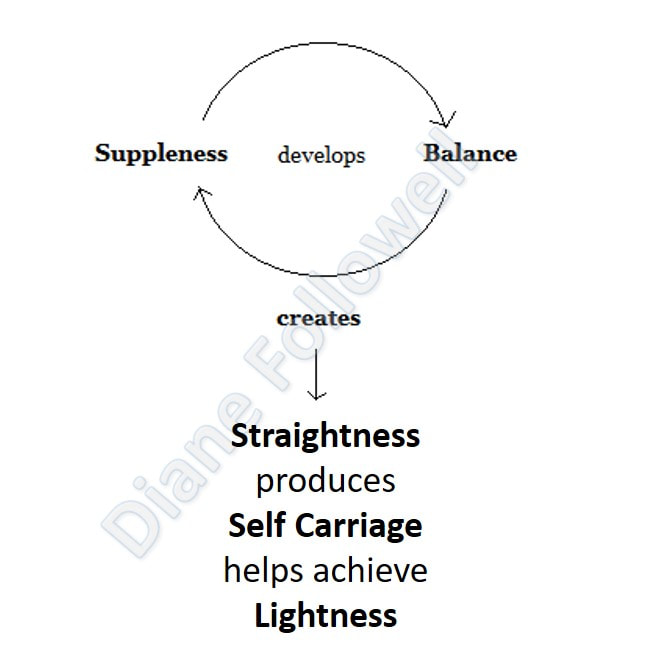 Balance is key to developing self-carriage and lightness. Circles start to create a supple horse and are the first lesson in balance. A correctly ridden circle teaches a horse many things: To give round the riders inside leg To start to engage the inside hind To stretch to the outside rein To develop suppleness in both directions You can feel when a horse is out of balance through the weight in their shoulder, the horse will drift towards the heavy shoulder. On a circle, your horse will drift out when the weight is to the outside shoulder. When the weight is to the inside shoulder, your horse falls into the circle. Identifying a loss of balance In the first picture below, you can see that the horse has lost her balance and put weight in the outside shoulder in order to come round the corner. The second picture shows the effects of this unbalanced corner, as the horse is comes down the straight side of the school crooked. The third picture shows the same horse coming round a corner in balance. The next two pictures show a horse in travers. The first picture shows a loss of balance; you can see the stiffness of the movement over the back and quarters, and weight is in the inside shoulder. You can also see the effect on the rider’s position, pushing her to the outside. In the second picture, the rider has corrected the bend, which has taken the weight out of the horse’s shoulder, and brought the horse back into balance. The horse has moved her weight out of the inside shoulder and this has allowed the hind legs support the weight, the head and neck to soften and the back to lift. Also the rider is now sitting balanced and centred. It takes time to build up enough suppleness for your horse to be able to keep the bend and his balance, but time spent now will be repaid later. If you rush this part of the training, you will have problems in later work and then you will have to come back to this work to make the correction.
|
AuthorDiane Followell Classical Dressage Trainer 
|


 RSS Feed
Telephone+44 (0)7931551014
|
info@dianefollowell.com
|
© Diane Followell 2015 -2024.
All Rights Reserved.
All images and content are copyright Diane Followell unless otherwise stated.
All Rights Reserved.
All images and content are copyright Diane Followell unless otherwise stated.